Gingerbread Trick Or Treaters!
As an Amazon Associate I earn from qualifying purchases.
If you enjoy reading Southern Plate, you might enjoy subscribing by email to receive an email from me each time a new recipe is posted. Click here to subscribe!
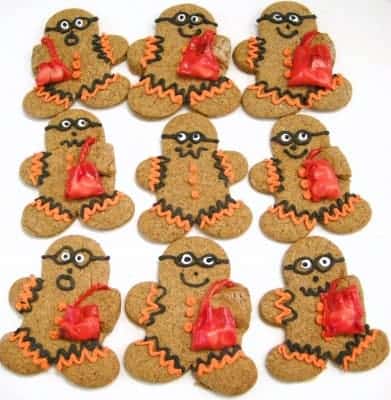
Aren’t these little fellas adorable? I wanted to bring this to y’all last year but time got away with me and before I knew it, it was too late for a Halloween post. This year I just barely made it in time – WHEW!
These are time consuming, but really worth it to bring your little Gingerbread Trick or Treaters to life! I came up with this idea when Bradybug was in Kindergarten and made them for his entire class (and some of the school staff, too). I made the cookies from scratch then (using the recipe I’m gonna put at the bottom of this post), but this time I made them from a mix. Trust me, as much work as I put into decorating them, they will officially count as homemade regardless!
Although I had not made these since again that first time when Brady was in kindergarten, he walked in from school and saw them on the counter and said:
“COOL! You made the gingerbread men again like you did for my Kindergarten class!”
I had to blink and look at him for a moment as this hit home.
“You mean you remember them?”
“Oh yeah, Ma, those were the coolest cookies ever!”
~sighs happily~ I love my babies.
Lets make some memories, shall we?
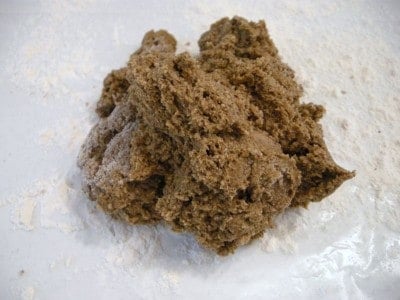
Voila! Zis post begins vith our dough alveady made!
And me writing in an accent that is an odd mix of German and French.
No idea why I was compelled to do that but we take what we can get, right?
Don’t worry, I’m jes a lil ole Southern gal again
Anyway, as mentioned in the introduction, I used a boxed mix to make these for this post because I just didn’t have the time to do them from scratch (very busy day). I am gonna give you the recipe to make them from scratch at the bottom if you prefer though. Normally, I prefer to make them from scratch just so I can have a chance to lick the measuring cup after I’ve measured out molasses!
So in that previous photo what I did was place a big old glob of dough onto a floured surface. I like to roll out some waxed paper for this so I can just roll it all up and have instantly clean counters afterward. Instantly clean anything is always a plus, right?
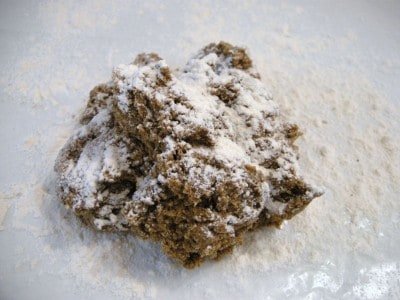
Dust your dough with more flour…
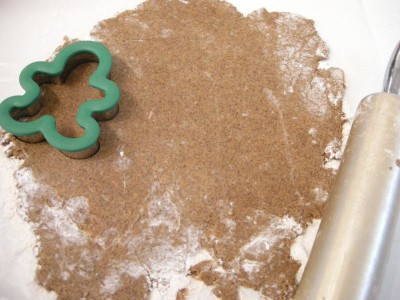
Give your rolling pin a good dusting as well and roll out the dough to about 1/4 inch thick.
Note: I never actually make my dough 1/4 inch thick, I’m always just a wee bit thicker.
Makes it feel a bit less delicate in my mind.
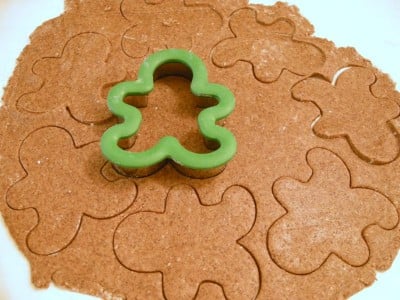
Cut out your little fellas.
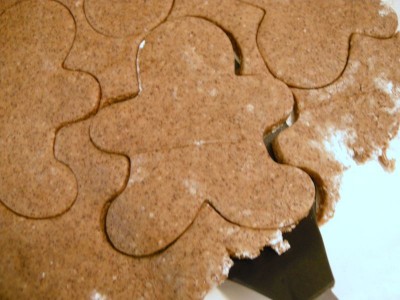
Lift them up with a spatula to keep them all safe and secure. Place on greased baking sheets.
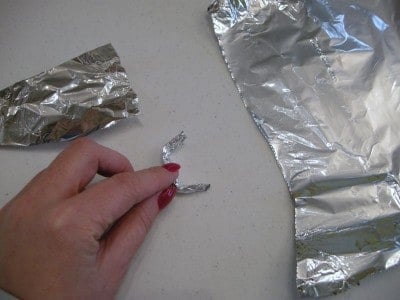
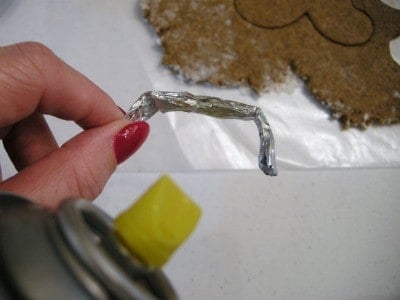
Take some aluminum foil and tear it into strips to roll up.
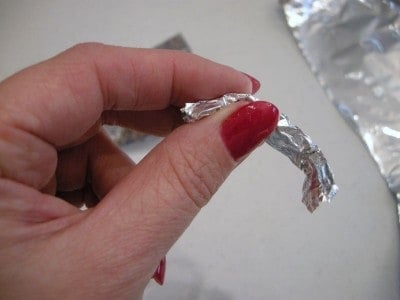
You need a piece about as long as a toothpick but about three times thicker.
I curve the ends on it so that they are sticking up and don’t dent my gingerbread’s face and body when he’s cooking.
Spray each one with cooking spray right before you put it on your gingerbread.
I originally tried this with toothpicks and the flexibility of aluminum foil worked a lot better, plus you can make it a bit thicker and that makes sticking your trick or treat back into the arm loop easier.
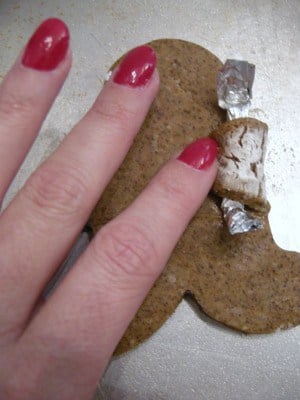
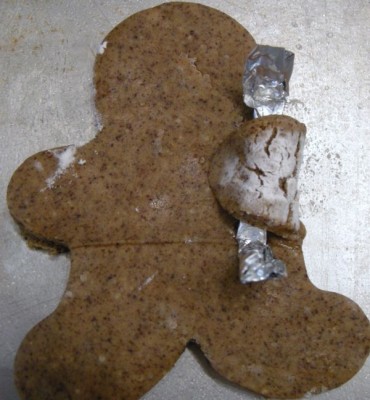
Place foil piece in fold of the gingerbread’s arm. Gently roll the arm around and press down lightly to seal it.
Like so.
After I do this part, I gently twist the foil piece back and forth a time or two to make sure I didn’t press the cookie into it. This makes it a bit easier to remove.
If any excess flour is showing, you can lightly remove it with a dry paintbrush, but as my Great Grandmother would say
“Well, it don’t bother me none.”
Bake these at 375 for about ten minutes, or until done and lightly browned on the edges.
If you make smaller gingerbread men, bake them at 350 for the same amount of time.
As soon as you remove them from the oven, remove the aluminum foil piece by twisting a little and then gently pulling it out. You want to do this while they are still warm because if the arm breaks or tears, you can gently press it back into place and it will be fine once the cookie has cooled.
While your cookies are cooling, mix up your royal icing. There are some key things to remember when working with royal icing.
- Royal icing hardens very quickly, keep any icing you are not using covered with a wet cloth to prevent it from drying out.
- Any utensils or bowls used to make royal icing must be absolutely grease free. Wash them well in hot water and use plenty of dish liquid. Rinse well and dry well.
- Royal Icing gets it’s name from being a royal pain to deal with. (just kidding – kinda)
- When working with Royal Icing and an icing bag, it helps to have a bowl with a damp paper towel in the bottom so you can set your icing back down and point the tip into the paper towel to keep it from drying out when you are in between uses.
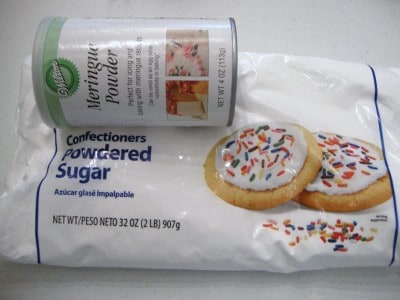
For our icing, we’re gonna need Meringue powder and confectioner’s sugar.
But Christy, I’ve never seen meringue powder before, where can I find it?
Good question anonymous voice in my head and thanks for asking! You can find it in several places. I usually get mine in the craft department at Wally World on the cake decorating aisle. You can also find it at Michael’s Arts And Crafts Store and Hobby Lobby, also on their cake decorating aisle.
Any of y’all scared by the fact that I just has a question and answer session with myself?
This is my super duper clean mixing bowl with a little bit of water in it to start things off.
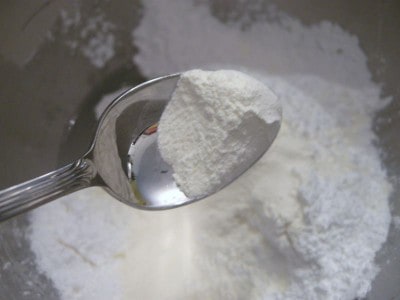
Add confectioner’s sugar and meringue powder.
(recipe at bottom)
There are plenty of recipes circulating that use egg whites instead of meringue powder if you prefer but I’m a meringue powder girl because it is so easy.
Beat that up with an electric mixer for about five to seven minutes, until stiff peaks form.
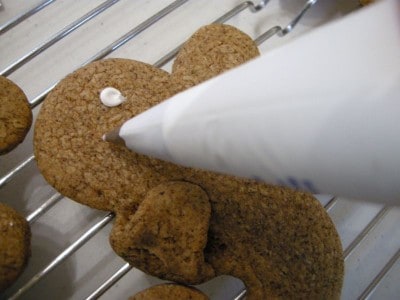
Using a little white, place two dots on each cookie for eyes.
I use a #2 icing tip and a reusable icing bag, both found where you find the meringue powder. These reusable bags can be turned inside out and washed in the dishwasher to use again and again. They are awful handy to have around. I just used the same tip and the same bag for each color and washed them both well by hand in between uses.
The key to decorating with an icing bag and tip is to stop applying pressure before you lift your tip of from the surface.
Take remaining icing and divide it in half.
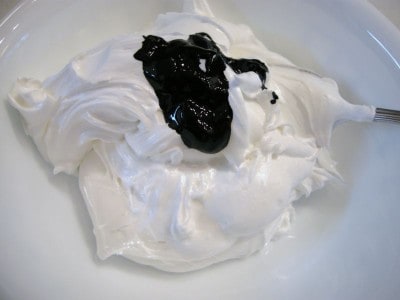
Color half black and half orange.
I use Paste icing colors (technically they are called paste colors but they look like a gel), which can also be found in the cake decorating section at any of the stores that carry the Meringue powder. They are just over a dollar each.
Place a wet towel over each bowl to prevent it from drying out while you are not using it.
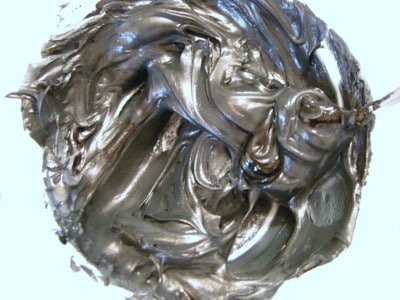
Stir that up well
(of course, you’ll want to do this for the orange icing as well but I’m just showing you the black icing I mixed)
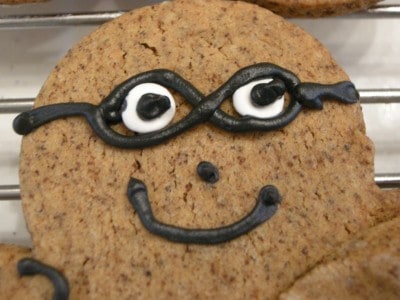
Using black icing, draw a figure eight over the two eyes.
Add handles to the glasses along with facial features.
I like this squiggly guy…
This guy had a cute little smile on his face until Katy asked “Mama, can I eat one now?” and I replied “In a few minutes, Katy“
dun Dun DUN!
Bless his little ginger heart.
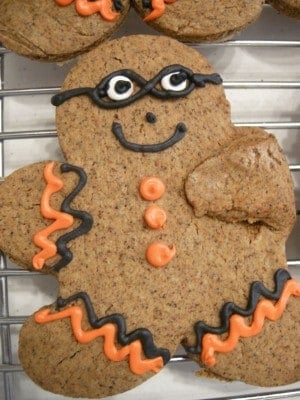
I added squiggly details to the arms and legs in both icing colors and the buttons to the front in orange.
Hey little fellas!
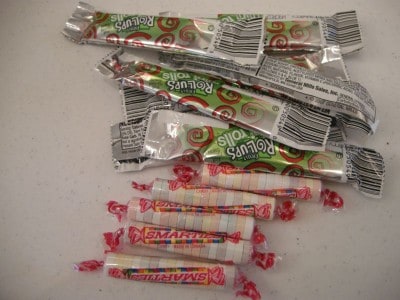
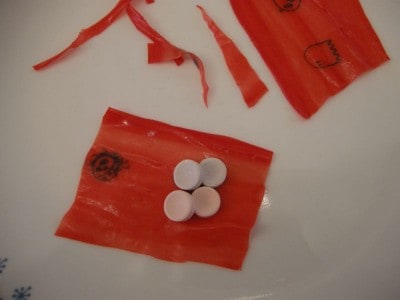
For the candy you’ll need fruit roll ups and smarties (or some other small candy). You can also use fruit leathers if you like.
When you unroll your fruit roll ups they will be a little misshapen so I use kitchen shears to trim off the angled ends and make little squares. I used mini fruit roll ups and each one yielded two squares. The pieces you trim off will be used as the handles for the trick or treat bags.
Place a few smarties on one side of each square (or rectangle as it may be..).
I prefer fruit roll ups without the little tongue tattoos but this is what I had on hand and I’m not one to go out and get something when I can make do.
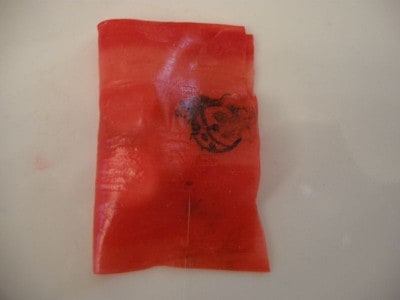
Fold the other side over the candy.
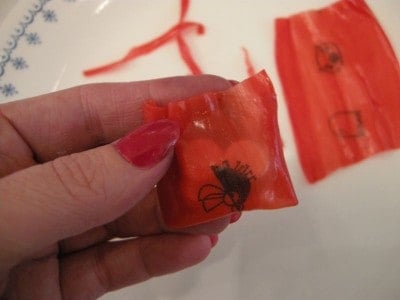
Fold each side over to seal it, leaving the top open.
I like to push the top together a bit to gather it up some and make it look more like a sack.
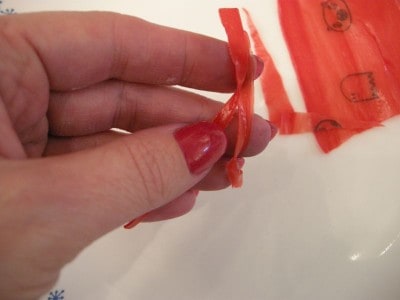
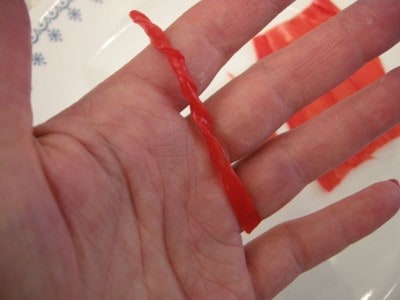
Take two of the pieces you cut off to even up the square and twist them together a bit to join them.
Like this.
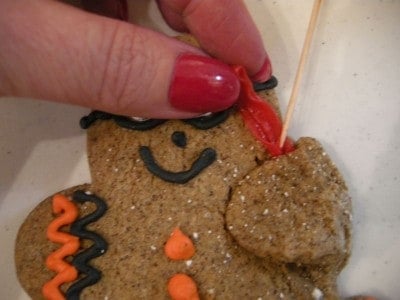
Using a toothpick to help you, push one of the ends down into the top opening in the gingerbread’s arm
Repeat with the other end, forming a “C” shape that appear to go all the way through the arm.
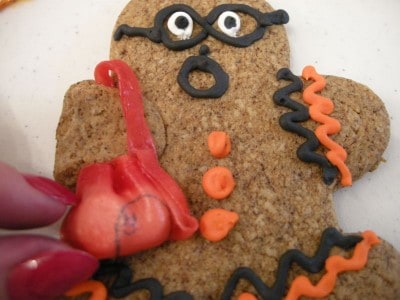
Place a dot of royal icing (any color) on top of the trick or treat bag handle.
Gently press bag on top of icing dot.
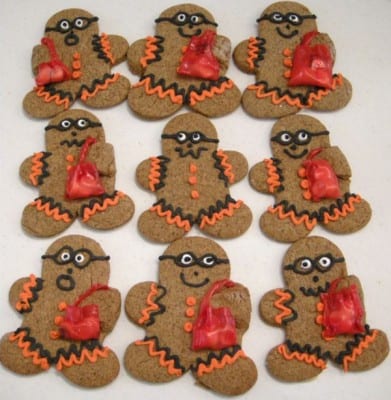
Look at my little fellas!
These two are a bit nervous because I mentioned that I was going to put them in treat bags.
Katy was keeping a close watch on them the entire time I was making them because she was afraid they would come to life and try to get away. She said she if any of them tried that she’d grab them and eat them really quick! heehee
Hello again, little fellas!
I used two boxes of gingerbread mix and made very large cookies, ending up with just a few shy of two dozen. You can make smaller gingerbread men and have many more out of the same effort.
These are the little Party bags you can find at Wally World for about a $1.50 or so for eight in the party favor section. I love them and use them for TONS of things. If you go to get some for this, buy plenty of extra ones because I use them a lot in my Christmas gift posts that I’m going to bring you.
They do tend to get a bit skittish when you bag them up…
But they sure are lovable!
I hope you get to make these and promise they will be memorable if you do!
BUT, if you can find store bought undecorated gingerbread cookies…
You could have just as much fun and make just an impression by decorating them this way as well. Just wrap the trick or treat bag handle completely around the gingerbread’s arm and attach it to his body with royal icing. You can duplicate the rest of these decorating ideas as well.
Just because you take a short cut doesn’t mean it is any less special or that you are any less AWESOME!
style=”text-align: center;”>~~~~~~~~~~~~~~~~~~~~~~~~~~~~~~~~~~~~~
Recipes for Gingerbread Trick Or Treaters
*For this tutorial I used a boxed gingerbread cookie mix made by Betty Crocker. Any brand boxed gingerbread cookie mix will do. Below is the homemade recipe I use when I make them from scratch.
Ingredients
Homemade Gingerbread Recipe
(Adapted from the back of a jar of Grandma's Molasses - a brand name)
- 1 stick margarine softened
- 1/2 cup sugar
- 1/2 cup Molasses
- 1 egg
- 2 cups all purpose flour
- 1 teaspoon baking soda
- 1/4 teaspoon salt
- 1 teaspoon ginger
- 1 teaspoon cinnamon
- 1/8 teaspoon ground cloves
Royal Icing
- 3 Tablespoons meringue powder
- 4 cups 1 lb confectioner's sugar
- 6-8 Tablespoons warm water I use a little more to make it easier on my hands
Instructions
- Beat butter with sugar and molasses. Mix in egg. Sift dry ingredients and add to wet mixture. Mix well.
- Chill in freezer 1 hour or in refrigerator 2 hours.
- Heat oven to 350ºF. Roll out half of the dough 1/4-in. thick on lightly floured surface (I use waxed paper on top of the counter top for easy cleanup).
- Cut with cookie cutter, place on greased baking sheets. If decorating with raisins, add them at this time. Bake 8-10 minutes. Cool. Decorate with royal icing as desired.
*Larger men like mine need to be baked at 375 for 10 minutes.
To make icing
- Beat all icing ingredients together with electric mixer on high speed seven to ten minutes, or until stiff peaks form.
Nutrition
“Even a mistake may turn out to be the one thing necessary to a worthwhile achievement.”
-Henry Ford
Submitted by:I Play Outside The Box To submit yours, click here!
















.wwwwwwwwwwwwwwwwwwwwwwwwwwwwwwwwwwwwwwwwwwwwwwwwwwwwwwwwwwwwwwwwwwwwwwwwwwwwwwwwwwwwwwwwwwwwwwwwwwwwwwwwwwwwwwwwwwwwwwwwwwwwwwwwwwwwwwwwwwwwwwwwwwwwwwwwwwwwwwwwwwwwwwwwwwwwwwwwwwwwwwwwwwwwwwwwwwwwwwwwwwwwwwwwwwwwwwwwwwwwwwwwwwwwwwwwwwwwwwwwwwwwwwwwwwwwwwwwwwwwwwwwwwwwwwwwwwwwwwwwwwwwwwwwwwwwwwwwwwwwwwwwwwwwwwwwwwwwwwwwwwwwwwwwwwwwwwwwwwwwwwwwwwwwwwwwwwwwwwwwwwwwwwwwwwwwwwwwwwwwwwwwwwwwwwwwwwwwwwwwwwwwwwwwwwwwwwwwwwwwwwwwwwwwwwwwwwwwwwwwwwwwwwwwwwwwwwwwwwwwwwwwwwwwwwwwwwwwwwwwwwwwwwwwwwwwwwwwwwwwwwwwwwwwwwwwwwwwwwwwwwwwwwwwwwwwwwwwwwwwwwwwwwwwwwwwwwwwwwwwwwwwwwwwwwwwwwwwwwwwwwwwwwwwwwwwwwwwwwwwwwwwwwwwwwwwwwwwwwwwwwwwwwwwwwwwwwwwwwwwwwwwwwwwwwwwwwwwwwwwwwwwwwwwwwwwwwwwwwwwwwwwwwwwwwwwwwwwwwwwwwwewwwwwwwwwwwwwwwwwwwwwwwwwwwwwwwwwwwwwwwwwwwwwwwwwwwwwwwwwwwwwwwwwwwwwwwwwwwwwwwwwwwwwwwwwwwwwwwwwwwwwwwwwwwwwwwwwwwwwwwwwwwwwwwwwwwwwwswwwwwwwwwwwwwwwwwwwwwwwwwwwwwwwwwwwwwwwwwwwwwwwwwwwwwwwwwwwwwwwwwwwwwwxxxxxxxxxxxwwwwwwwwwwwwwwwwwwwwwwwwwwwwwwwwwwwwwwwwwwwwwwwwwwwwwwwwwwwwwwwwwwwwwwwwwwwwwwwwwwwwwwwwwwwwwwwwwwwwwwwwwwwwwwwwwwwwwwwwwwwwwwwwwwwwwwwwwwwwwwwwwwwwwwwwwwwwwwwwwwwwwwwwwwwwwwwwwwwwwwwwwwwwwwwwwwwwwwwwwwwwwwwwwwwwwwwwwwwwwwwwwwwwwwwwww33333333333333333333333333333333333333333333333333333333333333333333333333333333333333333333333333333333333333333333333333333333333333333333333333333333333333333333333333333333333333333333333333333333333333333333333333333333333333333333333333333333333333333333333333333333333333333333333333333333333333333333333333333333333333333333333333333333333333333333333333333333333333333333333333333333333333333333333333333333333333333333333333333333333333333333333333333333333333333333333333333333333333333333333333333333333333333333333333333333333333333333333333333333333333333333333333333333333333333333333333333333333333333333333333333333333333333333333333333333333333333333333333333333333333333333333333333333333333333333333333333333333333333333333333333333333333333333333333333333333333333333333333333333333333333333333333333333333333333333333333333333333333333333333333333333333333333333333333333333333333333333333333333333333333333333333333333333333333333333333333333333333333333333333333333333333333333333333333333333333333333333333333333333333333333333333333333333333333333333333333333333333333333333333333333333333333333333333333333333333333333333333333333333333333333333333333333333333333333333333333333333333333333333333333333333333333333333333333333333333333333333333333333333333333333333333333333333333333333333333333333333333333333333333333333333333333333333333333333333333333333333333333333333333333333333333333333333333333333333333333333333333333wwwwwwwwwwwwwwwwwwwwwwwwwwwwwwwwwwwwwwwwwwwwwwwwwwwwwwwwwwwwwwwwwwwwwwwwwwwwwwwwwwwwwwwwwwwwwwwwwwwwwwwwwwwwwwwwwwwwwwwwwwwwwwwwwwwwwwwwwwwwwwwwwwwwwwwwwwwwwwwwwwwwwwwwwwwwwwwwwwwwwwwwwwwwwwwwwwwwwwwwwwwwwwwwwwwwwwwwwwwwwwwwwwwwwwwwwwwwwwwwwwwwwwwwwwwwwwwwwwwwwwwwwwwwwwwwwwwwwwwwwwwwwwwwwwwwwwwwwwwwwwwwwwwwwwwwwwwwwwwwwwwwwwwwwwwwwwwwwwwwwwwwwwwwwwwwwwwwwwwwwwwwwwwwwwwwwwwwwwwwwwwwwwwwwwwwwwwwwwwwwwwwwwwwwwwwwwwwwwwwwwwwwwwwwwwwwwwwwwwwwwwwwwwwwwwwwwwwwwwwwwwwwwwwwwwwwwwwwwwwwwwwwwwwwwwwwwwwwwwwwwwwwwwwwwwwwwwwwwwwwwwwwwwwwwwwwwwwwwwwwwwwwwwwwwwwwwwwwwwwwwwwwwwwwwwwwwwwwwwwwwwwwwwwwwwwwwwwwwwwwwwwwwwwwwwwwwwwwwwwwwwwwwwwwwwwwwwwwwwwwwwwwwwwwwwwwwwwwwwwwwwwwwwwwwwwwwwwwwwwwwwwwwwwwwwwwwwwwwwwwwwwwwwwwwwwwwwwwwwwwwwwwwwwwwwwwwwwwwwwwwwwwwwwwwwwwwwwwwwwwwwwwwwwwwwwwwwwwwwwwwwwwwwwwwwwwwwwwwwwwwwwwwwwwwwwwwwwwwwwwwwwwwwwwwwwwwwwwwwwwwwwwwwwwwwwwwwwwwwwwwwwwwwwwwwwwwwwwwwwwwwwwwwwwwwwwwwwwwwwwwwwwwwwwwwwwwwwwwwwwwwwwwwwwwwwwwwwwwwwwwwwwwwwwwwwwwwwwwwwwwwwwwwwwwwwwwwwwwwwwwwwwwwwwwwwwwwwwwwwwwwwwwwwwwwwwwwwwwwwwwwwwwwwwwwwwwwwwwwwwwwwwwwwwwwwwwwwwwwwwwwwwwwwwwwwwwwwwwwwwwwwwwwwwwwwwwwwwwwwwwwwwwwwwwwwwwwwwwwwwwwwwwwwwwiiiiiiiiiiiiiiiiiiiiiiiiiiiiiiiiiiiiiiiiiiiiiiiiiiiiiiiiiiiiiiiiiiiiiiiiiiiiiiiiiiiiiiiiiiiiiiiiiiiiiiiiiiiiiiiiiiiiiiiiiiiiiiiiiiiiiiiiiiiiiiiiiiiiiiiiiiiiiiiiiiiiiiiiwwwwwwwwwwwwwwwwwwwwwwwwwwwwwwwwwwwwwwwwwwwwwwwwwwwwwwwwwwwwwwwwwwwwwwwwwwwwwwwwwwwwwwwwwwwwwwwwwwwwwwwwwwwwwwwwwwwwwwwwwwwwwwwwwwwwwwwwwwwwwwwwwwwwwwwwwwwwwwwwwwwwwwwwwwwwwwwwwwwwwwwwwwwwwwwwwwwwwwwwwwwwwwwwwwwwwwwwwwwwwwwwwwwwwwwwwwwwwwwwwwwwwwwwwwwwwwwwwwwwwwwwwwwwwwwwwwwwwwwwwwwwwwwwwwwwwwwwwwwwwwwwwwwwwwwwwwwwwwwwwwwwwwwwwwwwwwwwwwwwwwwwwwwwwwwwwwwwwwwwwwwwwwwwwwwwwwwwwwwwwwwwwwwwwwwwwwwwwwwwwwwwwwwwwwwwwwwwwwwwwwwwwwwwwwwwwwwwwwwwwwwwwwwwwwwwwwwwwwwwwwwwwwwwwwwwwwwwwwwwwwwwwwwwwwwwwwwwwwwwwwwwwwwwwwwwwwwwwwwwwwwwwwwwwwwwwwwwwwwwwwwwwwwwwwwwwwwwwwwwwwwwwwwwwwwwwwwwwwwwwwwwwwwwwwwwwwwwwwwwwwwwwwwwwwwwwwwwwwwwwwwwwwwwwwwwwwwwwwwwwwwwwwwwwwwwwwwwwwwwwwwwwwwwwwwwwwwwwwwwwwwwwwwwwwwwwwwwwwwwwwwwwwwwwwwwwwwwwwwwwwwwwwwwwwwwwwwwwwwwwwwwwwwwwwwwwwwwwwwwwwwwwwwwwwwwwwwwwwwwwwwwwwwwwwwwwwwwwwwwwwwwwwwwwwwwwwwwwwwwwwwwwwwwwwwwwwwwwwwwwwwwwwwwwwwwwwwwwwwwwwwwwwwwwwwwwwwwwwwwwwwwwwwwwwwwwwwwwwwwwwwwwwwwwwwwwwwwwwwwwwwwwwwwwwwwwwwwwwwwwwwwwwwwwwwwwwwwwwwwwwwwwwwwwwwwwwwwwwwwwwwwwwwwwwwwwwwwwwwwwwwwwwwwwwwwwwwwwwwwwwwwwwwwwwwwwwwwwwwwwwwwwwwwwwwwwwwwwrrrrrrrrrrrrrrrrrrrrrrrrrrrrrrrrrrrrrrrrwwwwwwwwwwwwwwwwwwwwwwwwwwwwwwwwwwwwwwwwwwwwwwwwwwwwwwwwwwwwwwwwwwwwwwwwwwwwwwwwwwwwwwwwwwwwwwwwwwwwwwwwwwwwwwwwwwwwwwwwwwwwwwwwwwwwwwwwwwwwwwwwwwwwwwwwwwwwwwwwwwwwwwwwwwwwwwwwwwwwwwwwwwwwwwwwwwwwwwwwwwwwwwwwwwwwwwwwwwwwwwwwwwwwwww
Hey, wwwwwwwwwwwwwwwwwwww is just an upside down way of saying “MMMM!”
hehe
I LOVE IT!!
Gratefully,
Christy
My Son is the one who alerted me to this post when he clicked on it while I was away. I think he is sending me hints as to what he wants for Halloween as always JOB WELL DONE!
I know how much work they were. When I was much younger I used to make cut out Christmas cookies and instead of frosting them, I had read somewhere about using egg yolk mixed with various colors of food color and then painting the colors on the cookies before baking them. Well I mentioned this idea to my Mother and she said using eggs like that could be dangerous and I should use canned milk, not the sweetened kind. Anyway the milk worked really well. I would buy a new pkg. of cheap watercolor brushes. As examples on the holly leaves I used green and drew a line down the middle and then shorter lines off to the side of the center line, then using red I made a set of three dots at the base of the center line. For the angels I painted their gowns various colors and the hair yellow. The bells I would paint various colors and make a band towards the bottom of a different color or sometimes I would paint star shapes on the plain dough. Of course Santa turned out mainly red. I received lots of raves on these, but boy it sure was a lot of work and I’m too old to do that now. In fact I don’t do any baking anymore because I turned out to be diabetic.
Oh they are adorable and I can appreciate how much work they were just by looking at them. I am glad you put the eyeglasses on some. I started wearing glasses when I was in second grade and some of the comments were mean and I well remember crying and feeling embarrassed. You have made the glasses look “cool”. I love the little gingerbread men and of course they are great again for Christmas with the icing colors changed to red and green. Never regret the time you spend on or for your children as it will always be remembered and you will always be loved. Have a great weekend everyone.
Oh they are adorable and I can appreciate how much work they were just by looking at them. I am glad you put the eyeglasses on some. I started wearing glasses when I was in second grade and some of the comments were mean and I well remember crying and feeling embarrassed. You have made the glasses look “cool”. I love the little gingerbread men and of course they are great again for Christmas with the icing colors changed to red and green. never regret the time you spend on or for your children as it will always be remembered and you will always be loved. Have a great weekend.
Those are too stinkin’ cute, Christy. There is way too much going on for me to make them this year but I’m gonna stick this in my recipe file for nextM
Wheeee! I’m first! These look adorable! My daughter will love making these this weekend. Thanks, Christy!
I think those are supposed to be masks….! But I, too, have worn glasses since I was 11, and I have collected several dolls when I see they wear glasses! :o)