Viennetta Ice Cream Cake
As an Amazon Associate I earn from qualifying purchases.
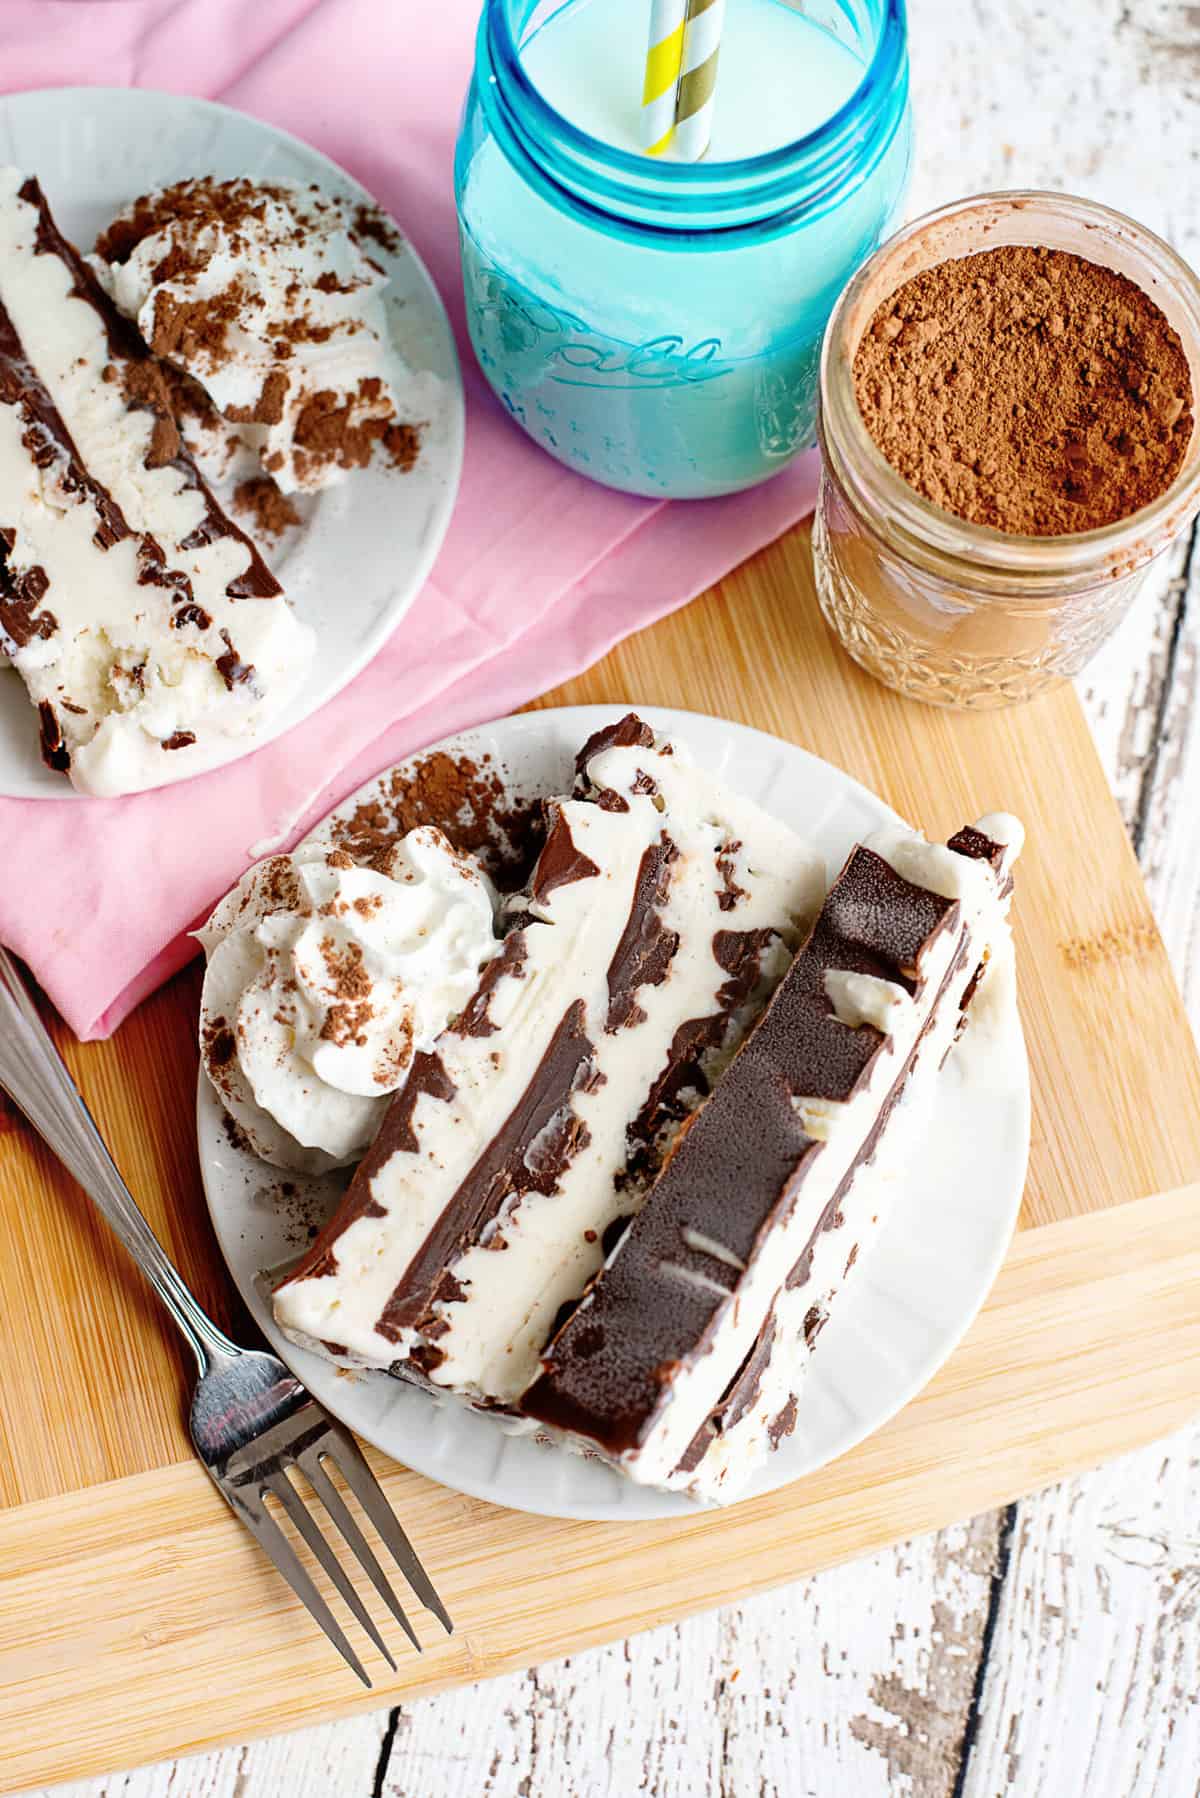
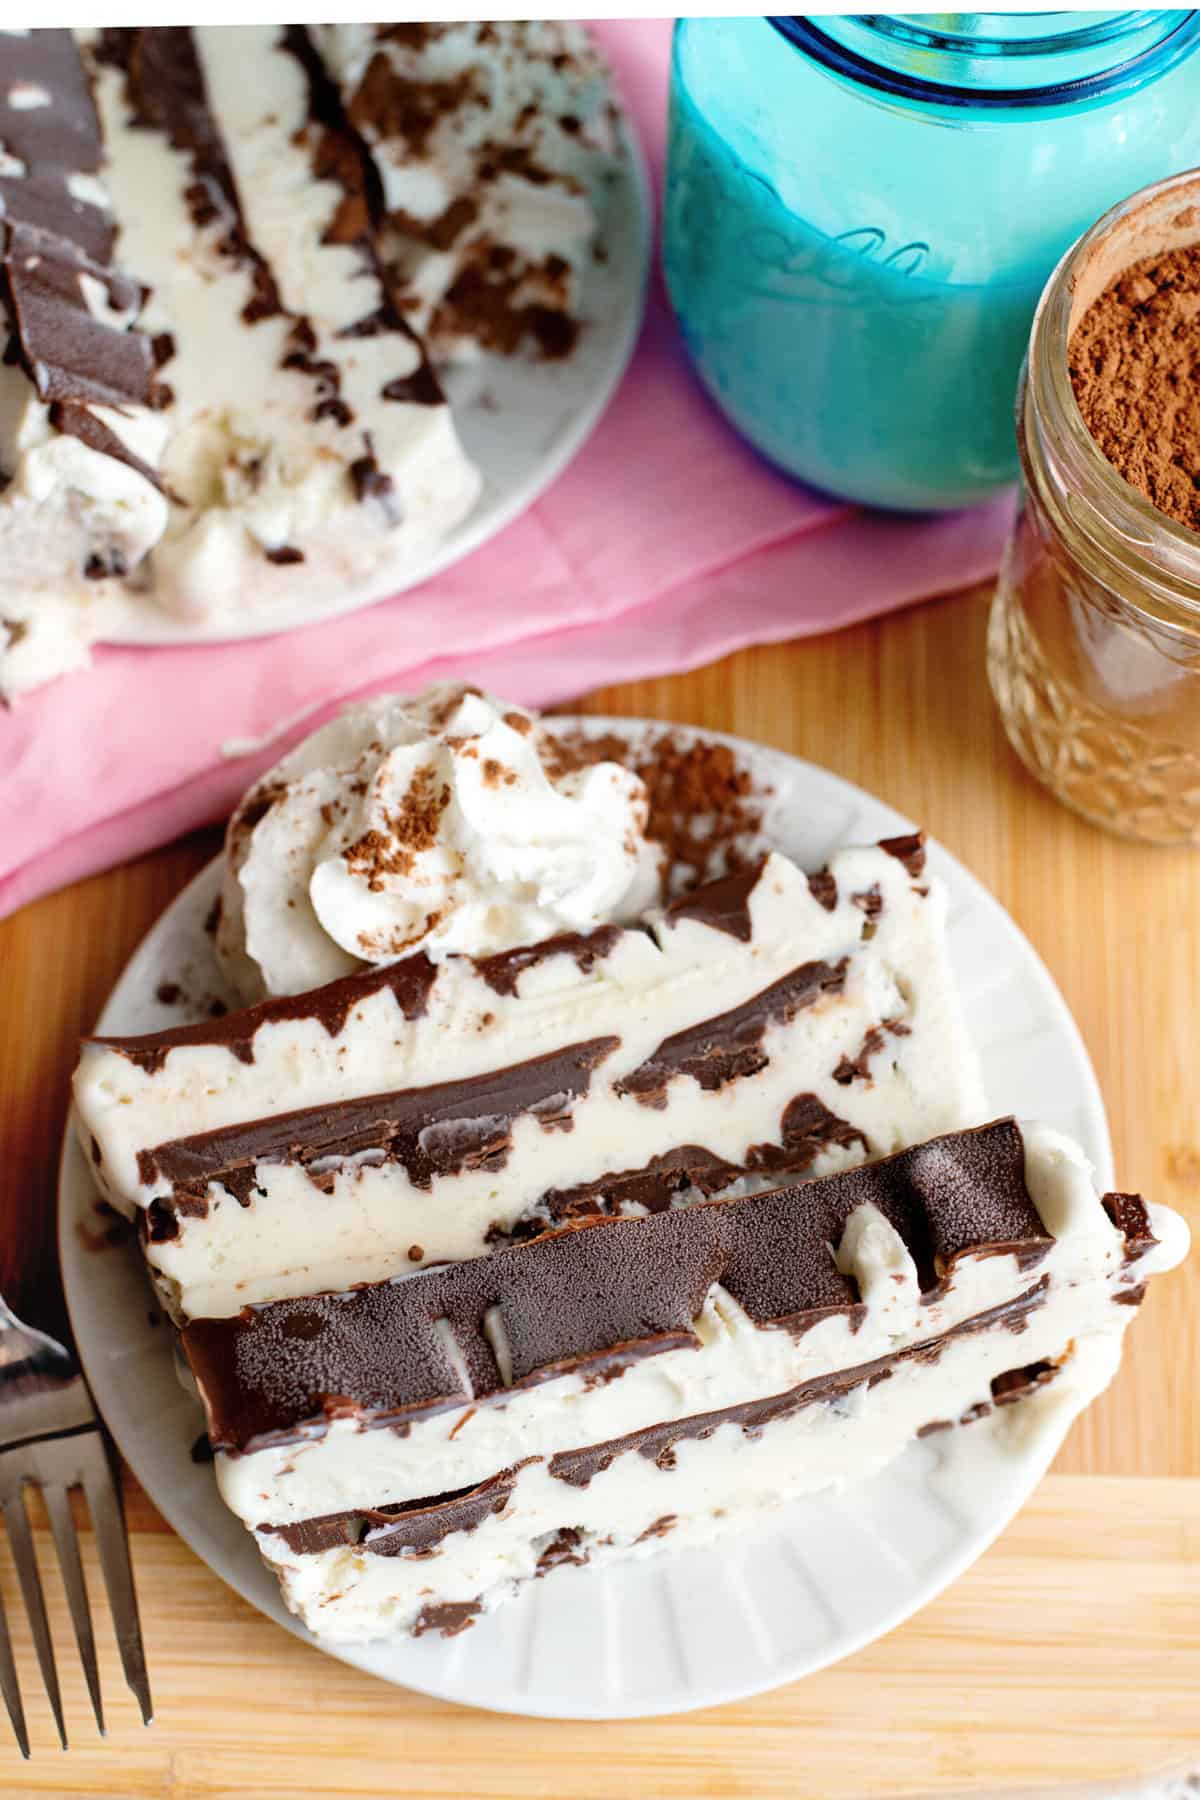
Serve up this timeless Viennetta ice cream cake for dessert this summer. It includes creamy vanilla ice cream decadently layered with both chocolate and butterscotch magic shell.
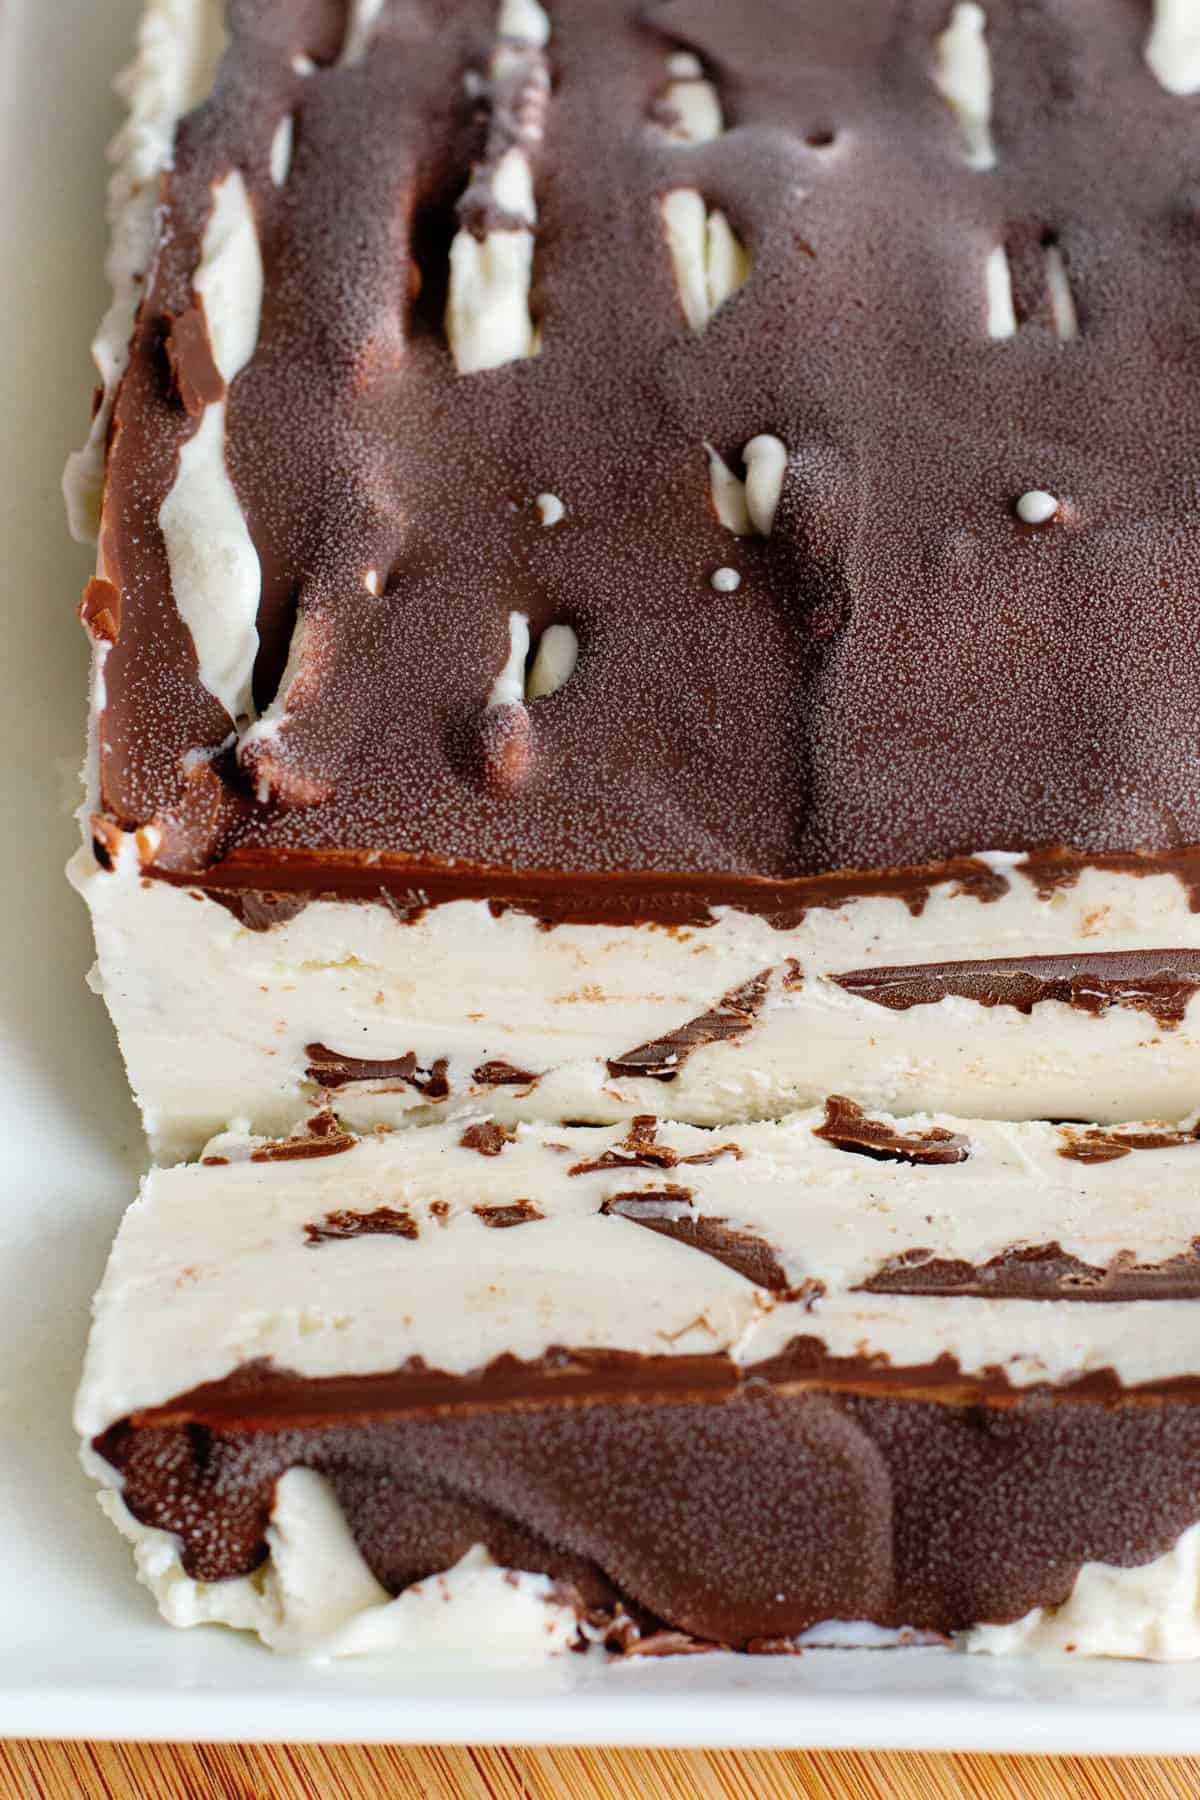
If you haven’t had Viennetta ice cream cake before, you are missing out. I like to refer to it as an ice cream lasagna. Layers of creamy ice cream and a crunchy magic shell layer. It’s a popular dessert that Breyers made years ago back in the 80s. The original Viennetta looked like a fancy cake log but it was made with ice cream with a crispy chocolate layer all throughout the dessert.
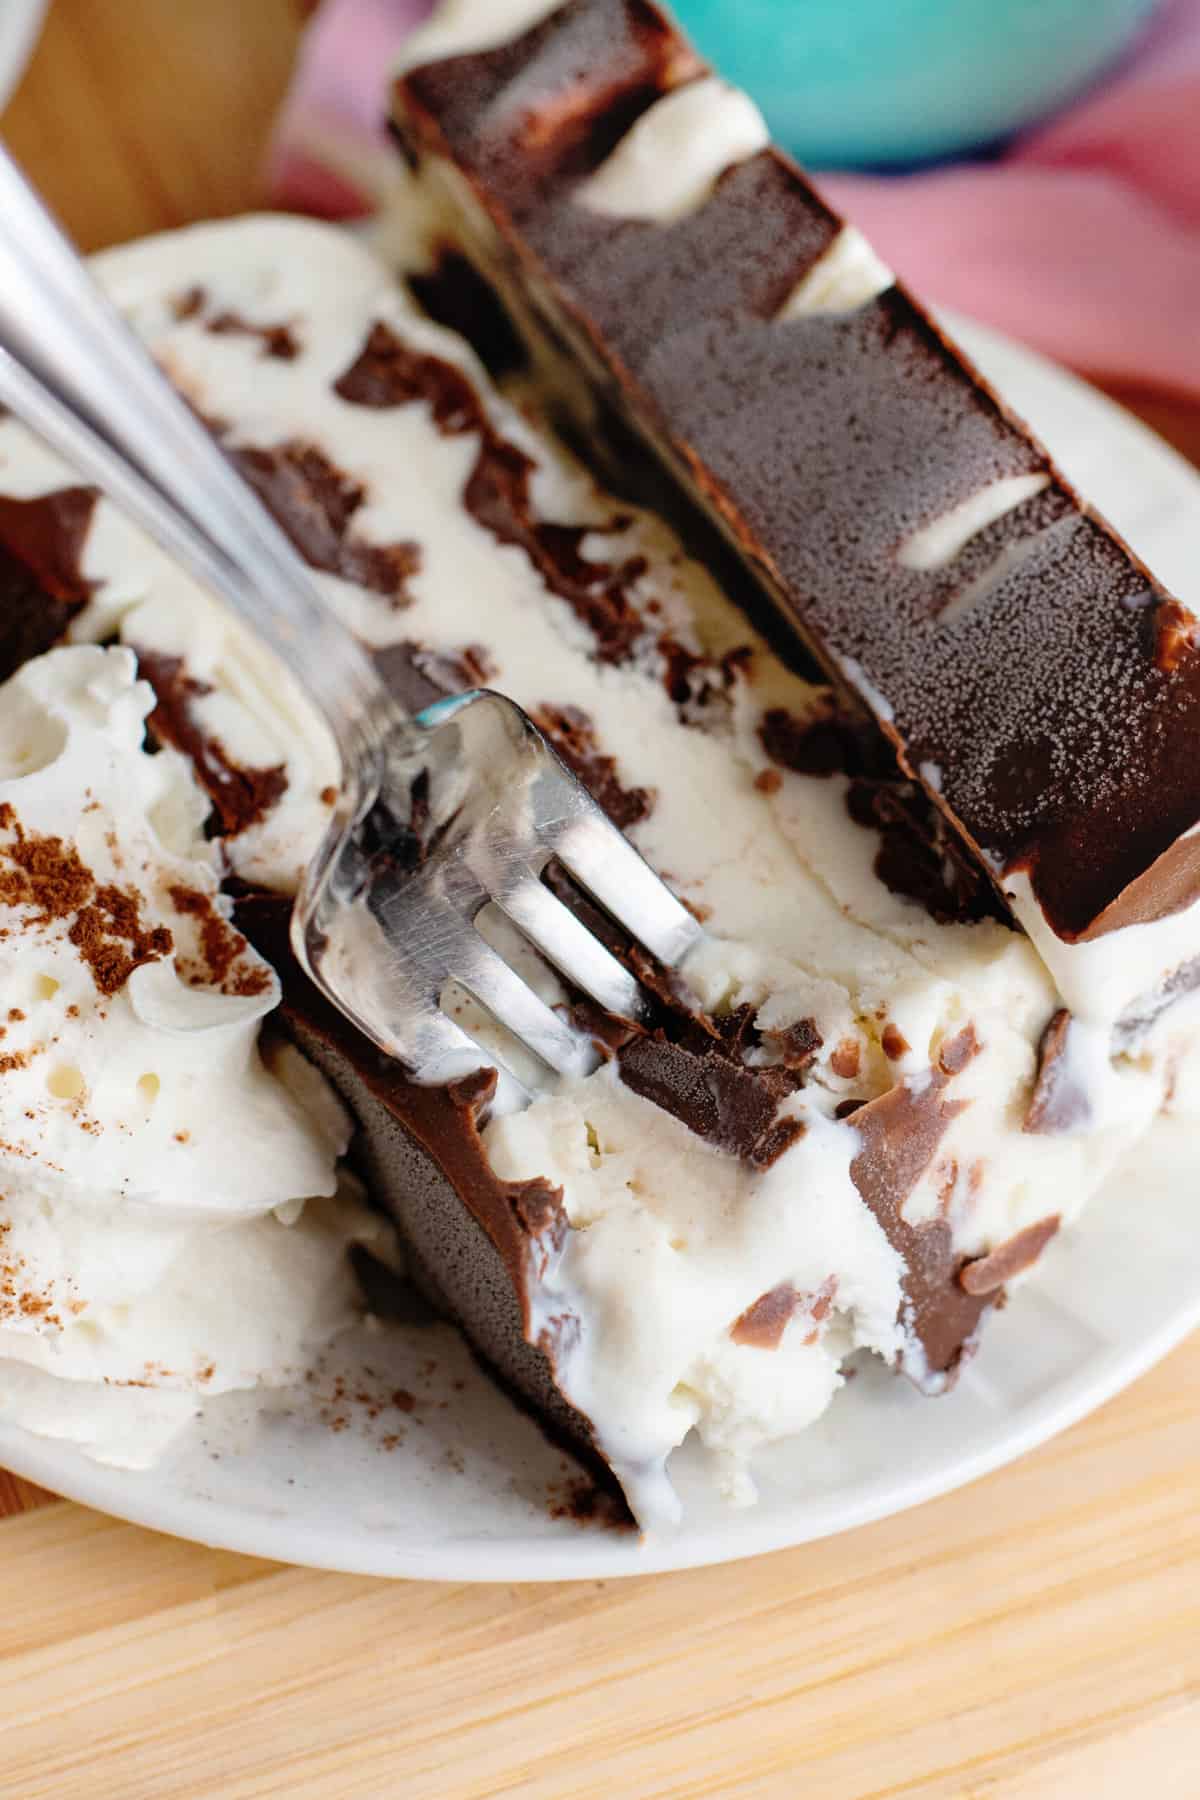
So each bite you get creamy ice cream with crispy sweet chocolate. There is something about that crispy chocolate layer in this layered Viennetta dessert that leaves you wanting one more bite. Bet you want to give it a go now, right?
Here are a few reasons why I think you need to immediately make my homemade Viennetta ice cream cake recipe:
- It’s so quick and easy to make. Like, it will take you no longer than 5 minutes to assemble.
- Viennetta is a classic dessert that guests will love.
- It’s basically fancy ice cream and who can say no to an elevated ice cream dessert?
- You only need three ingredients: vanilla ice cream, chocolate magic shell, and butterscotch magic shell.
Okay, so now I’ve convinced you to give it a go, let’s get layering!
If you love Ice Cream as much as I do make sure you try out some of these other recipes like Oreo Ice Cream Cake, Ice Cream Grahamwiches, Strawberry Ice Cream Pie, Deep Fried Ice Cream Milkshakes, No Churn Ice Cream With Fresh Blackberries and Mint Oreo Ice Cream Pie.
What You’ll Need to Make Viennetta Ice Cream Cake:
Recipe Ingredients
- Some good quality vanilla ice cream
- Magic shell (one or two flavors, up to you)
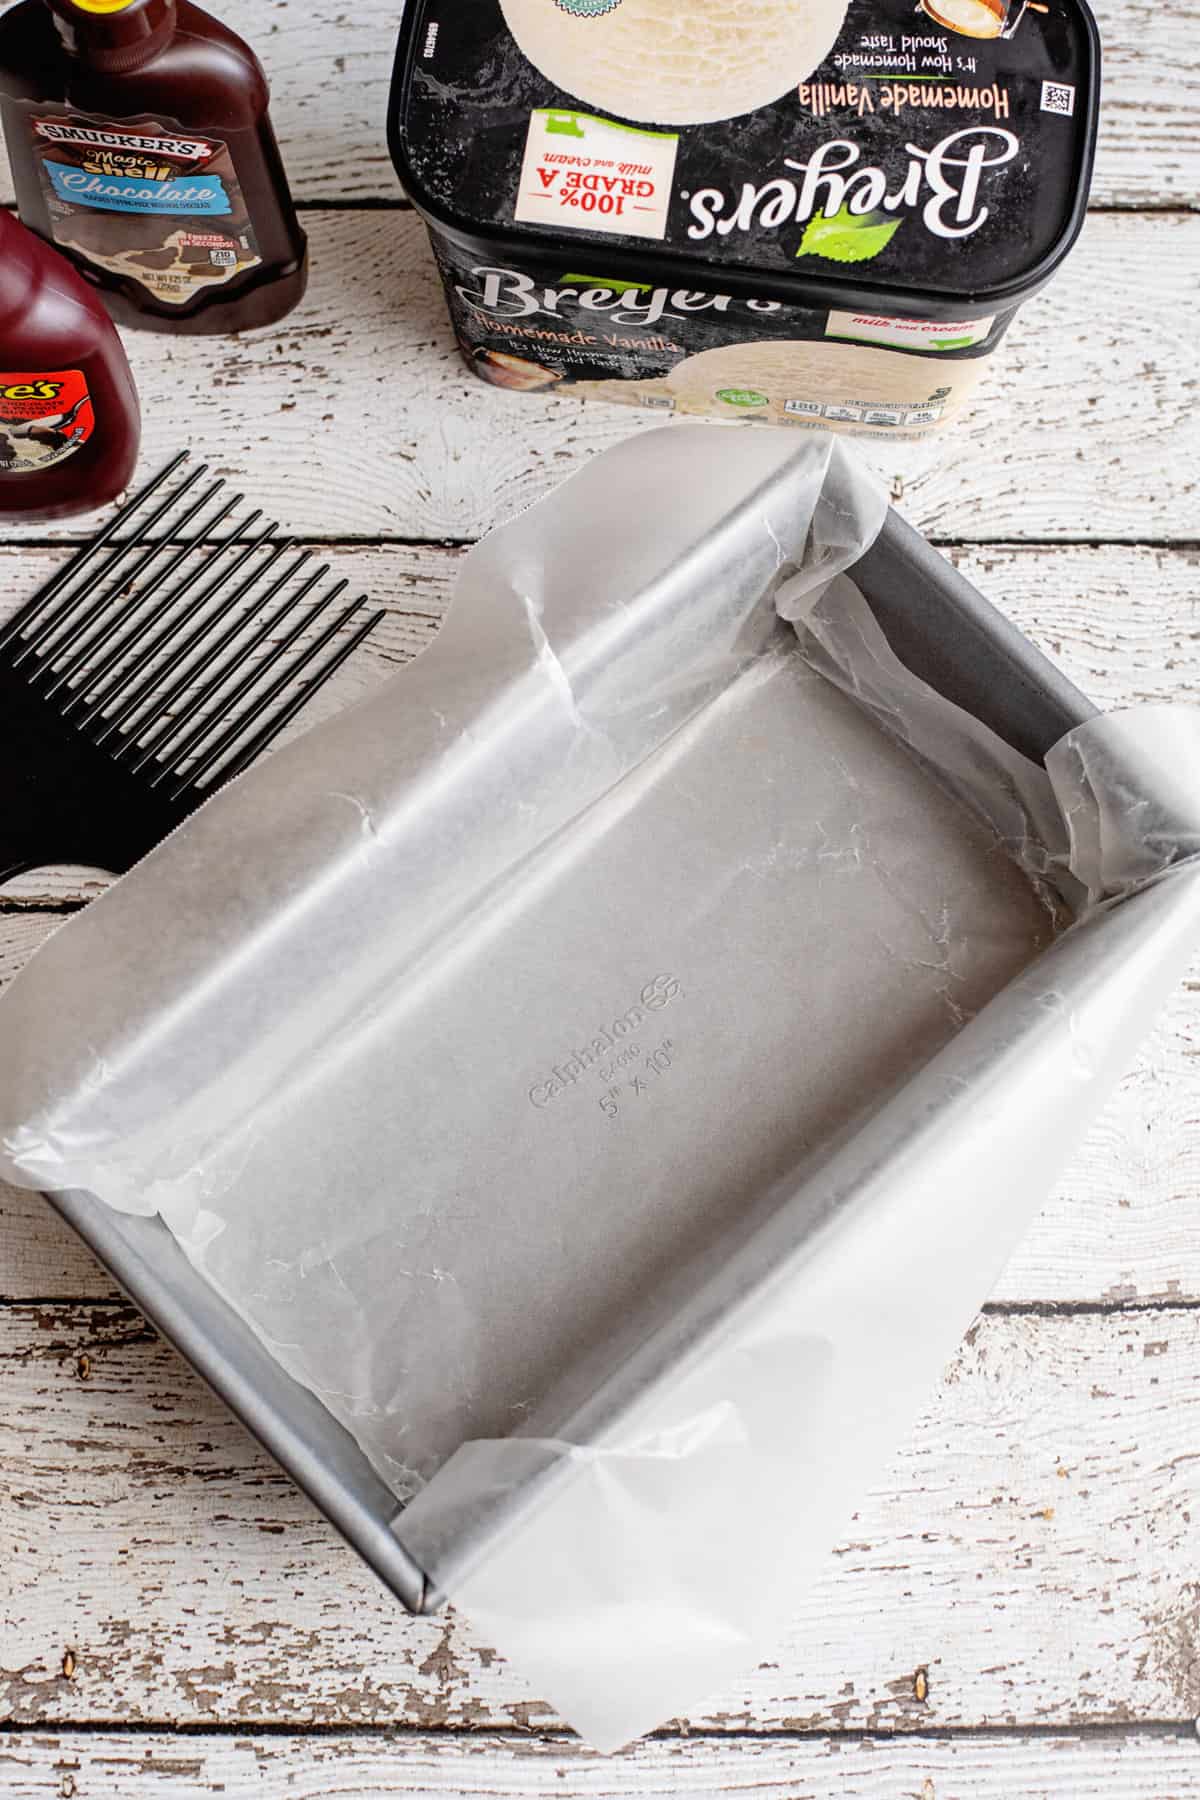
- Waxed paper
- Brand new (reserved for kitchen use only) hair pick
Helpful Kitchen Tools
How To Make My Homemade Viennetta Ice Cream Cake:
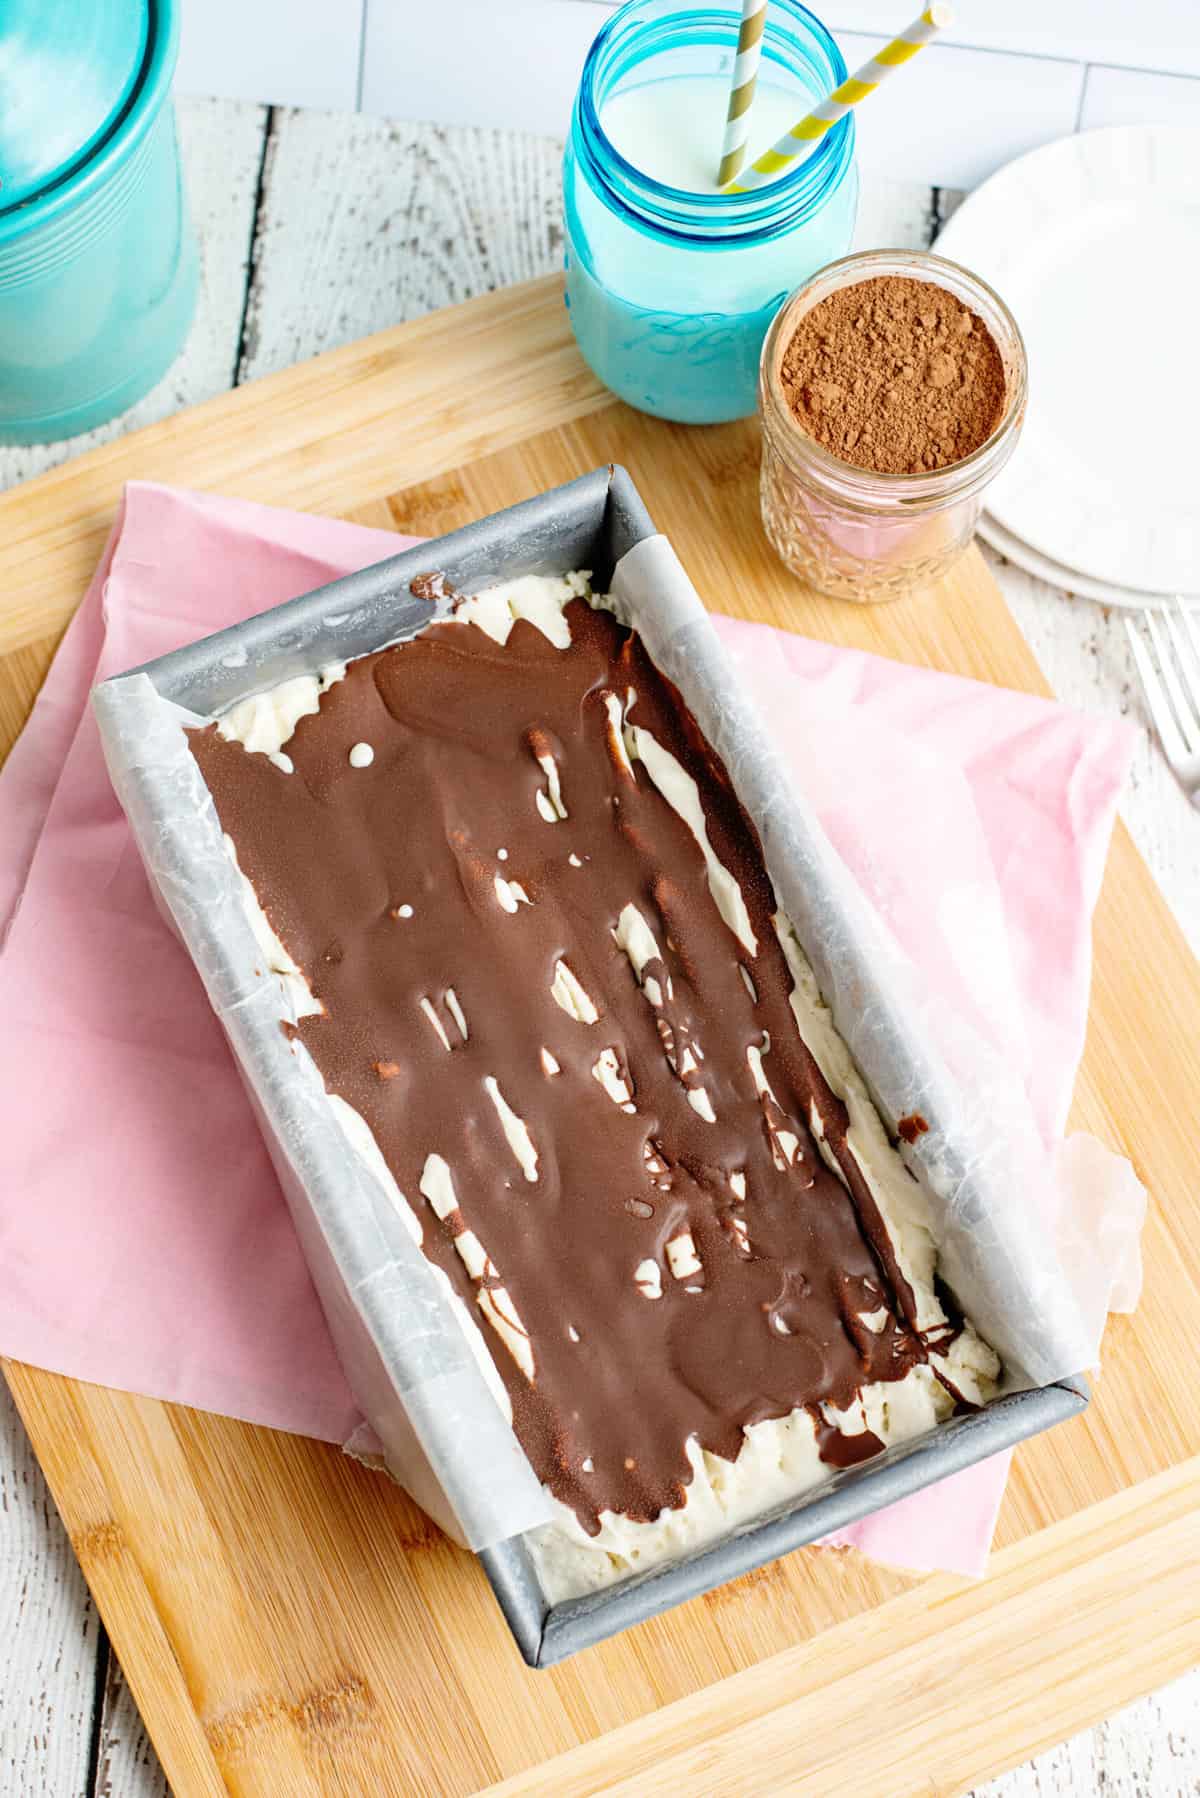
Line a loaf pan with waxed paper. This will help you get your loaf out.
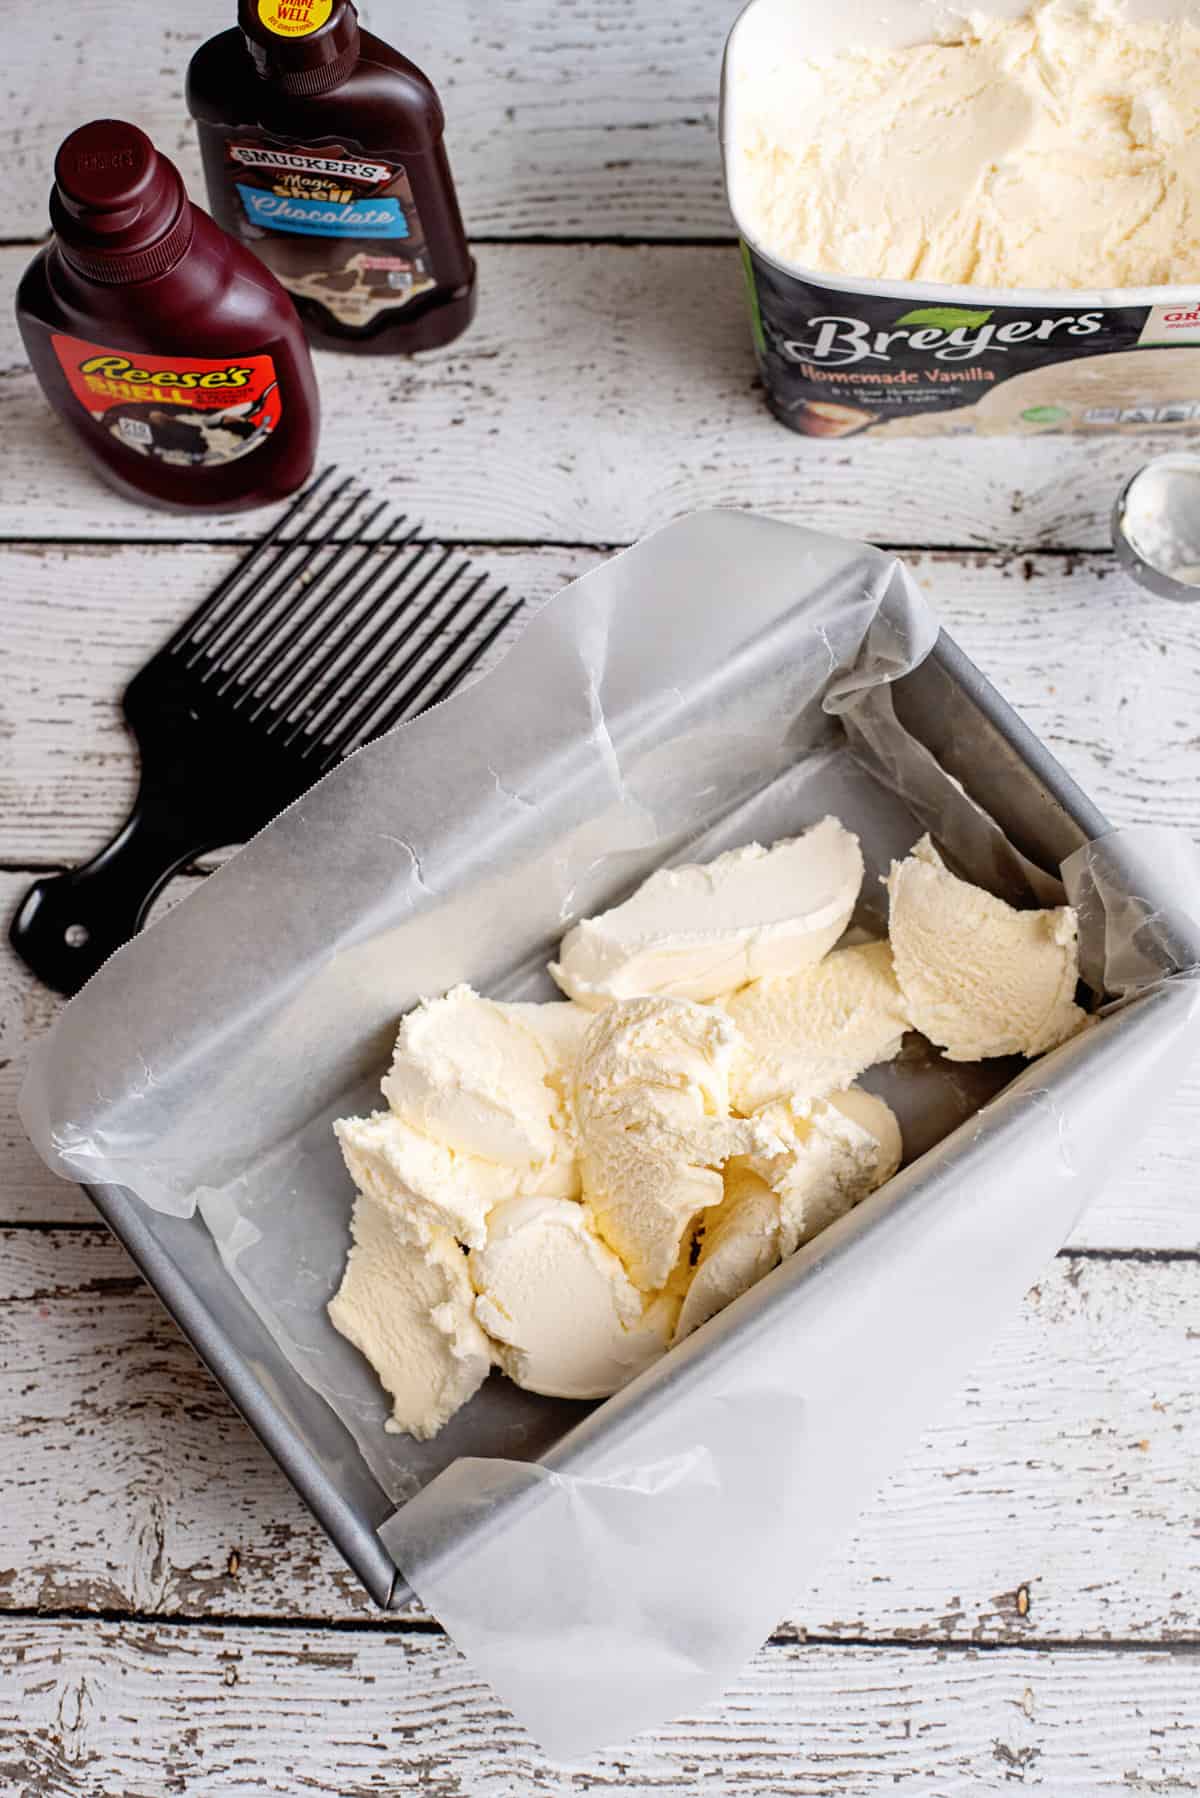
Spread 1/3 of your ice cream into the bottom of the loaf pan.
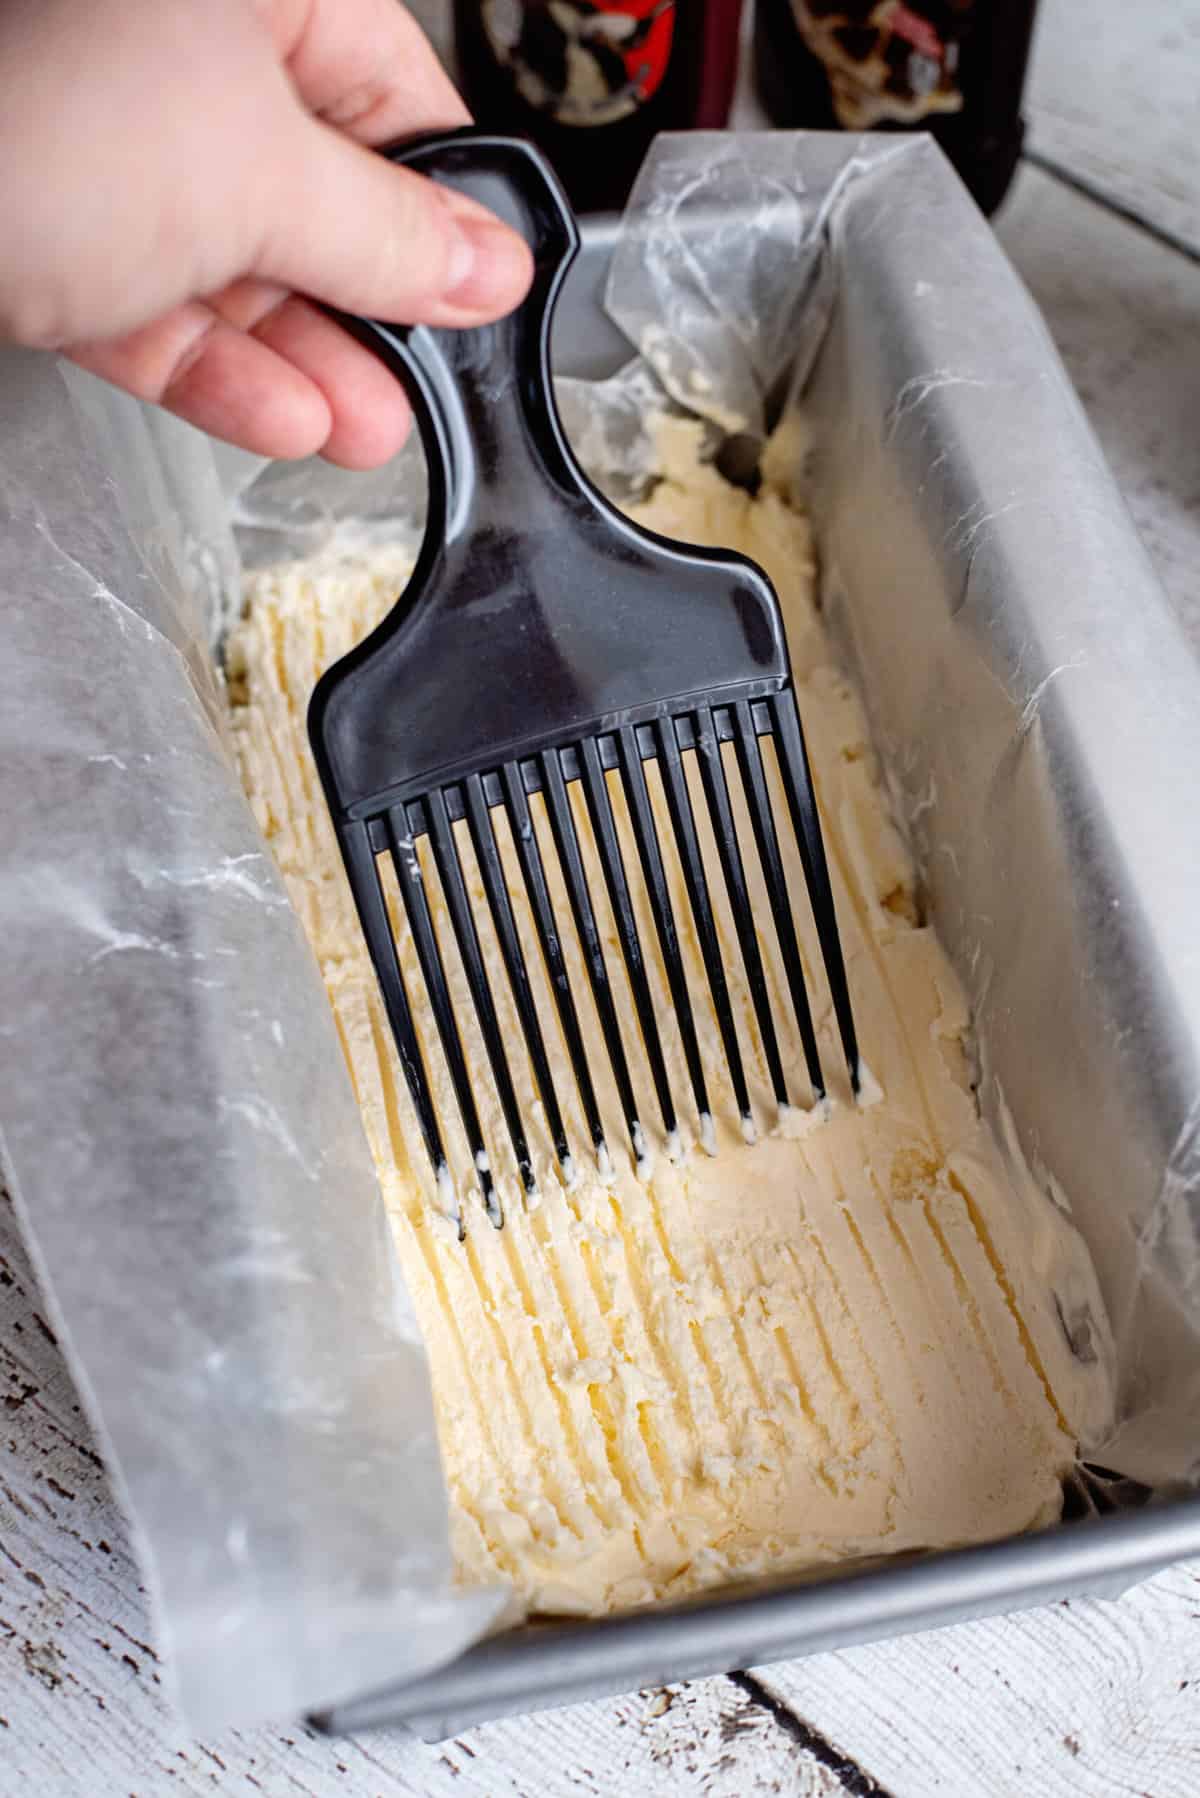
Run the pick along it to form deep grooves. These will fill in with our yummy magic shell.
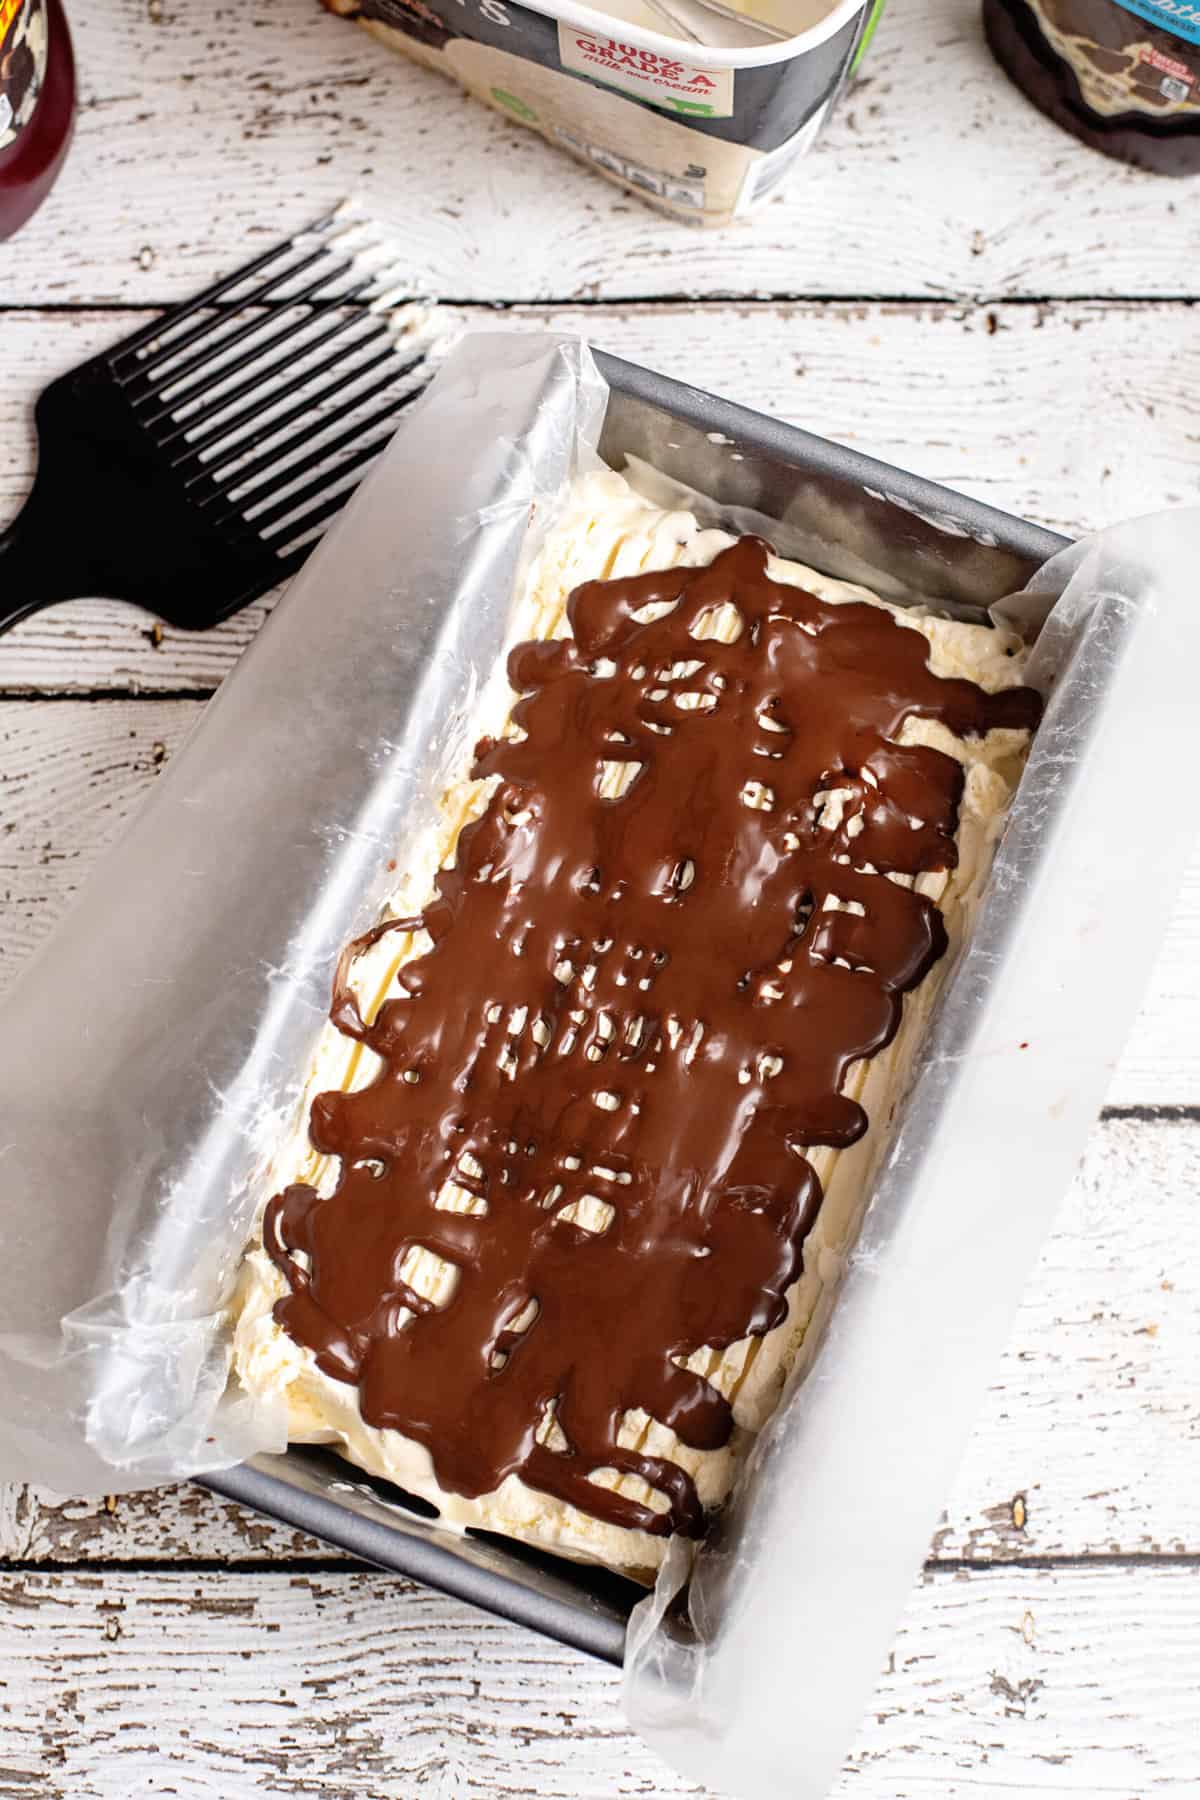
Pour a layer of magic shell over and allow it to harden a minute.
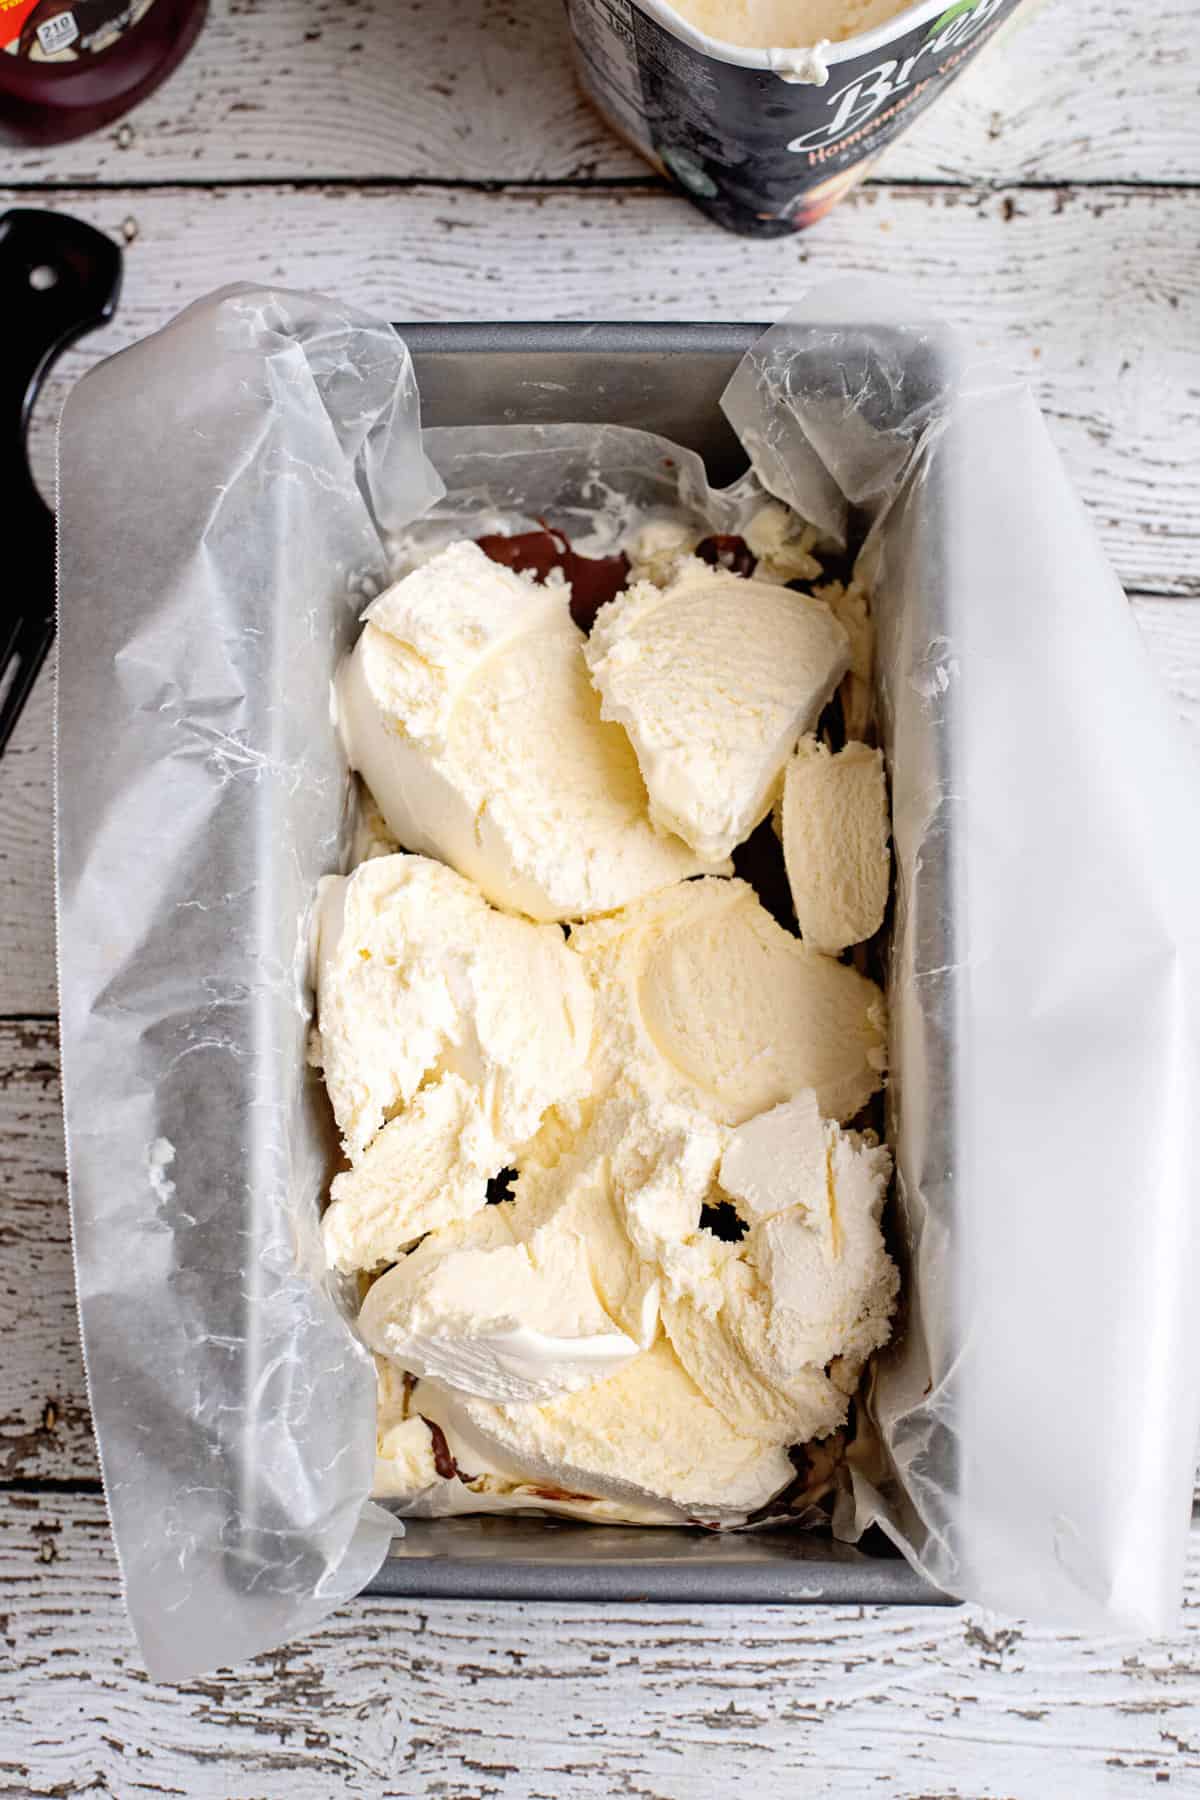
Add another 1/3 of your ice cream and dig grooves into it with your pick again.
Pour magic shell over that as well.
Now add the rest of our ice cream and dig grooves into it as well.
Top this final layer with a drizzle of the chocolate magic shell.
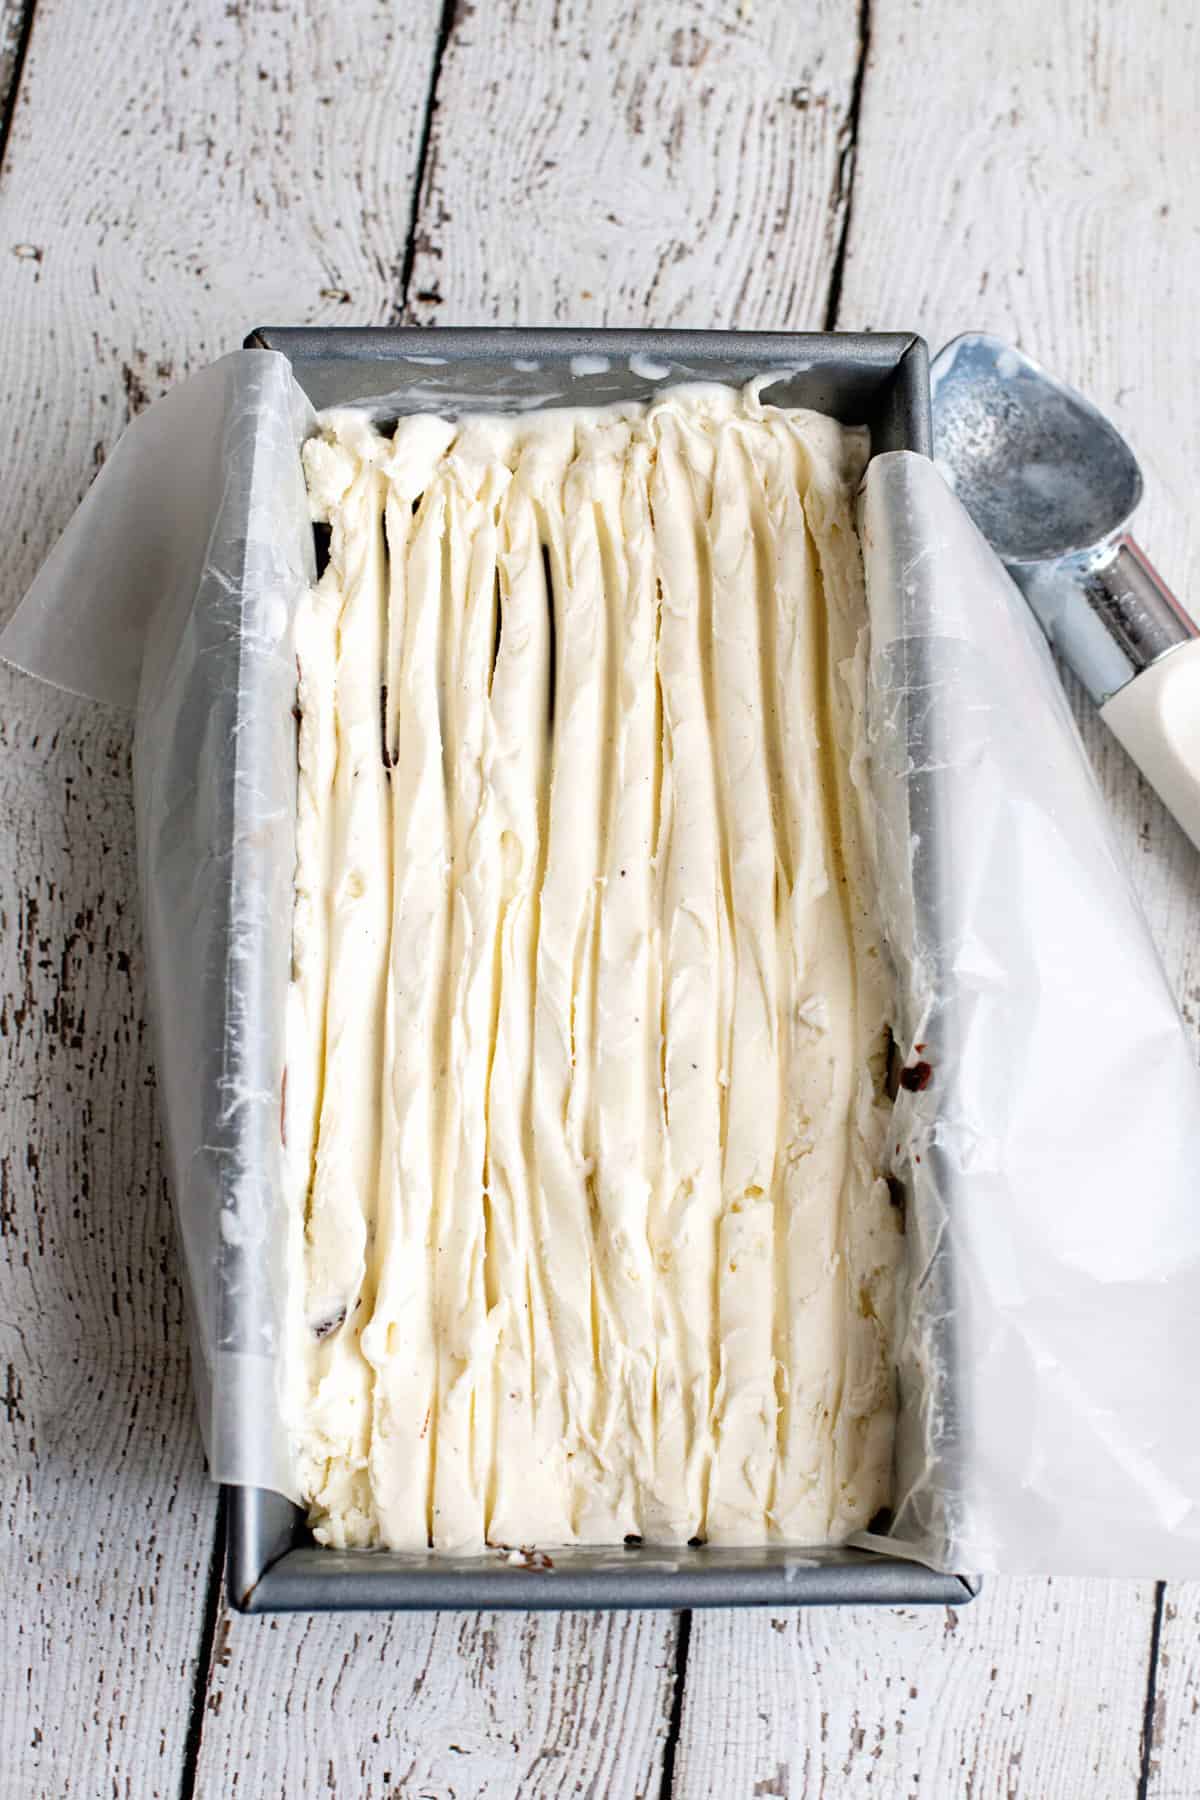
Immediately cover the ice cream cake with aluminum foil and place it in the freezer until firm.
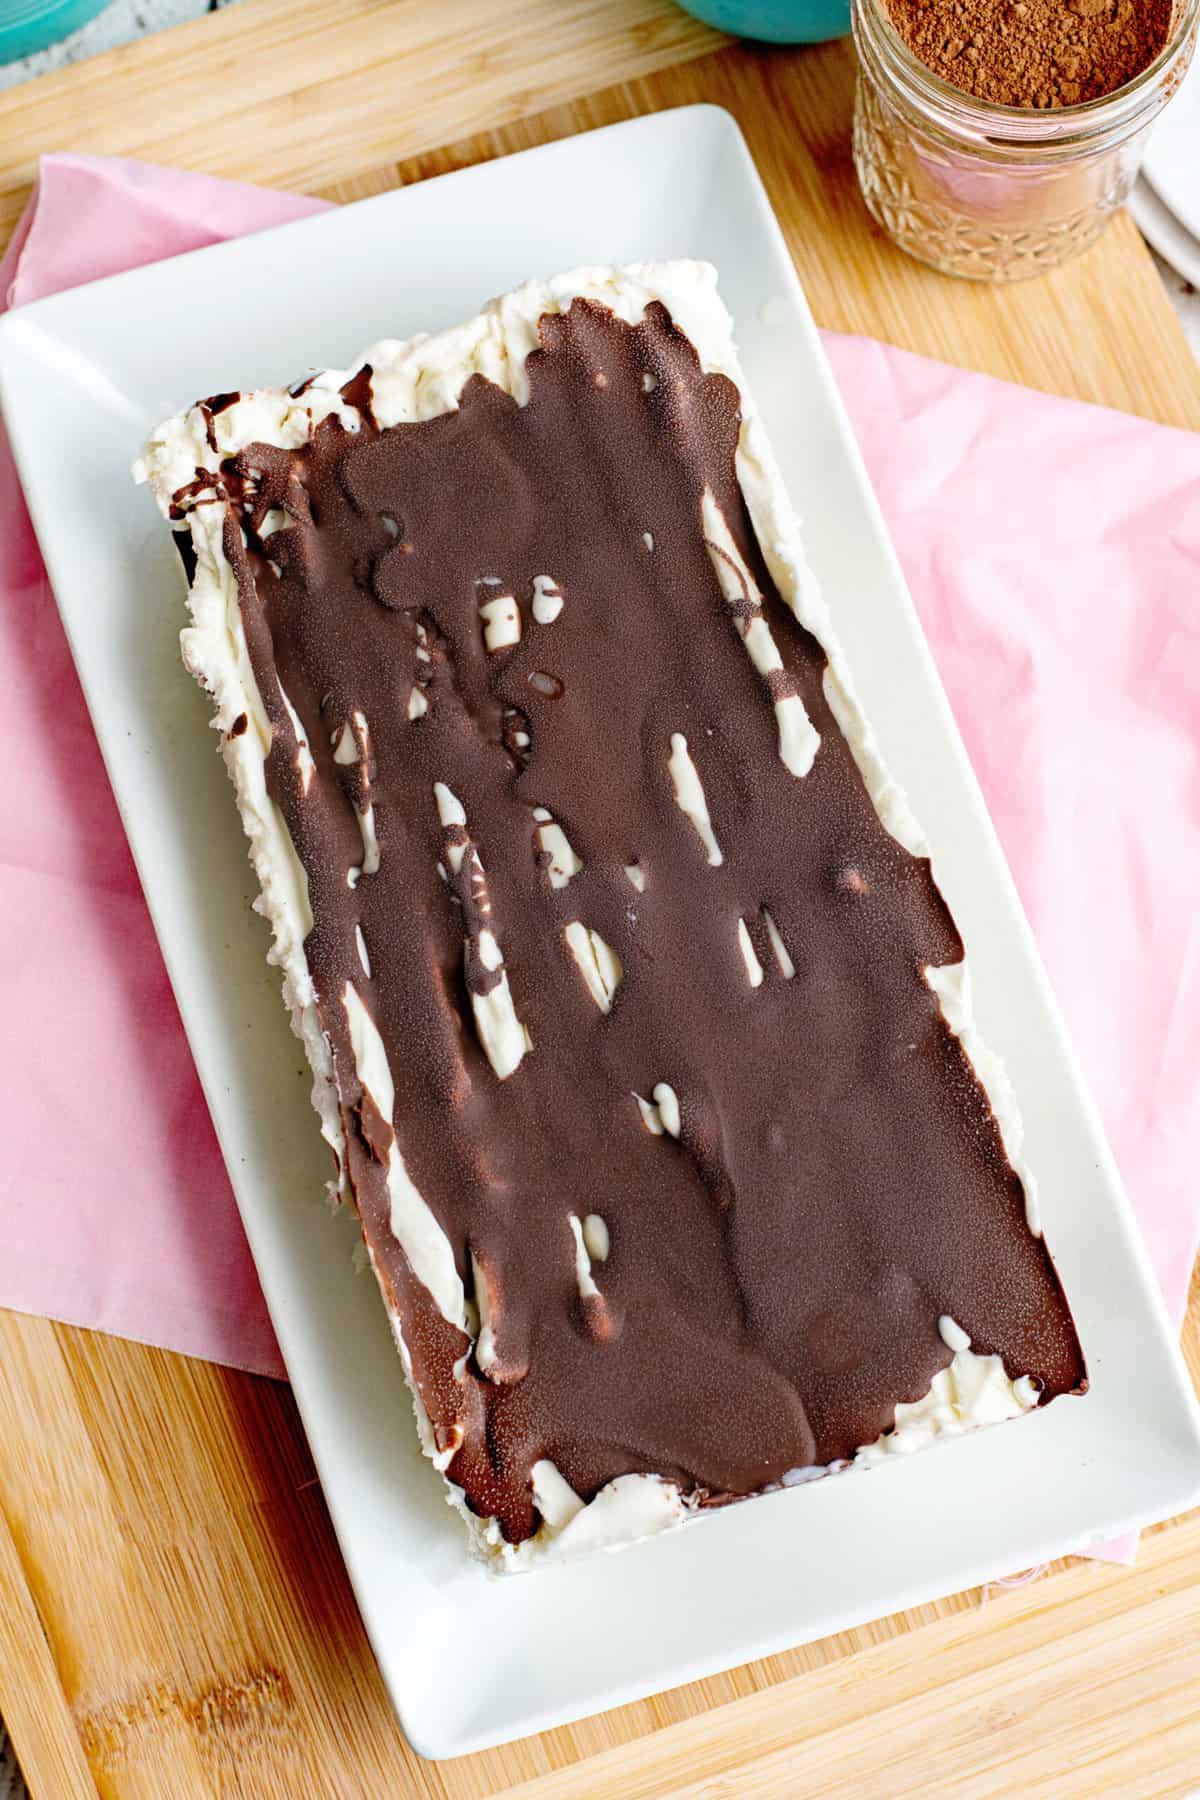
When ready to serve, allow it to sit out for about five minutes, and then remove it from the pan using the waxed paper.
Remove the waxed paper and place it on a platter to slice and serve.
Storage
Your ice cream can store for 3 to 4 months in the freezer. Just make sure to place it in a proper container for the freezer.
I recommend placing your ice cream cake on the back shelf, that way if you open and close the freezer it does not melt the ice cream.
Recipe Notes
- Using a fork or pick to create ridges into the ice cream helps to create that classic groove look from the ice cream and chocolate layer of the cake.
- You can make homemade magic shell if you want, but you can also buy it for about a dollar. No sense in making extra work for yourself!
- You can use any flavor of the magic shell to create a different flavor pairing. The original Viennetta ice cream cake did not have butterscotch so go with 2 bottles of chocolate if you want to be more traditional.
- Work somewhat fast, as the ice cream will melt pretty quickly once you get started assembling your dessert.
- For a fancy finish, add frozen whipped topping (like Cool Whip) and a sprinkle of cocoa powder for the iconic look. However, I’d only add this if I was eating it immediately.
- You can also add fun mix-in items to add flavor. Just add them over the magic shell once it hardens.
- Crush up and sprinkle with cookies like Oreo cookies.
- Add in some chopped candy bars.
- Add chopped nuts like roasted hazelnuts or almonds.
- Use a different flavor of magic shell.
- Swap the vanilla ice cream with chocolate ice cream, coffee ice cream, or any other ice cream flavor. You could also do one layer of vanilla, one layer of chocolate, and one layer of strawberry ice cream to make a Neopolitan Viennetta ice cream cake.
Recipe FAQs
What ice cream should I choose?
Quality ice cream is key in this Viennetta cake. The reason being is the ice cream is going to be a stand-out flavor. So reach for a creamy and delicious vanilla ice cream for this dessert.
I suggest Blue Bunny (this is the best I have tasted in a while) or something from Bluebell if you have that where you are. Edy’s also makes some very good ice cream and a lot of people swear by Purity. However, I haven’t had a chance to taste any of theirs yet so I’m just sticking to the ones I know as recommendations. Just go for the absolute best in your area.
You may also like these ice cream recipes:
Walnuts in Syrup For Ice Cream Sundaes
No Churn Ice Cream With Fresh Blackberries
Deep Fried Ice Cream Milkshakes
Ingredients
- 1.5 - 1.75 quarts good quality vanilla ice cream
- 1 bottle chocolate magic shell
- 1 bottle butterscotch magic shell*
Instructions
- Soften ice cream slightly by allowing it to sit out for 5-10 minutes but no longer.1.5 - 1.75 quarts good quality vanilla ice cream
- Line the loaf pan with waxed paper pieces that are long enough to hang over the sides.
- Spread 1/3 of the ice cream in the bottom of the loaf pan. Make grooves in it with the pick. Squirt chocolate magic shell over top, just enough to cover. Allow it to sit for one minute to harden.1 bottle chocolate magic shell
- Repeat the process using the butterscotch magic shell as topping on the second layer and then repeat once more, ending with just a drizzling of chocolate magic shell on top.1 bottle butterscotch magic shell*
- Immediately cover with aluminum foil and place in the freezer until frozen solid.
- To serve, remove the loaf pan and allow it to sit for five minutes. Grab both sides of waxed paper and pull the loaf out of the pan. Discard the waxed paper and place the loaf on a platter. Carefully cut and then serve.
Nutrition
“A happy person is not a person in a
certain set of circumstances, but rather
a person with a certain set of attitudes.”
~ Hugh Downs






Yum-Yum! I have not made this in years. I put gram crackers in the bottom of mine and minced maraschino cherries in the middle; otherwise it is the same as yours with chocolate shell.
Awesome Yummy! Will have to try this one immediately!
Love Your Cookbook!!!
;D)
Oh my goodness, I had totally forgotten about this from back in the day! How exciting! Can’t wait to have friends over and we can all take a trip down memory lane with this. Thanks for the reminder of a simpler time.
Wow, what a cute idea. I remember eating that. Definitely will be making this. Thanks for the idea!
I remember these, but I thought they were from the 60s. Your recipe is so simple it makes you go “DUH, why didn’t I think of that?” LOL
The one in the picture looks like it has a crust. Am I just seeing things? I’d think a graham cracker or shortbread cookie crust (or Oreo, heck, almost any cookie LOL) would be good under it all.
In the pictures, it looks like there might be a crust on the bottom. If so, what did you use?
No crust. Some magic shell seeped down 😉 but I have one I do use a crust on. Cookies or graham work great!
That’s a crust.
No ma’am. I make it a point not to lie 🙂
This looks great, I will make it for a family get together. I love your receipes!