Easy Reindeer Shirt (And great Deer gift ideas for Grandparents!)
As an Amazon Associate I earn from qualifying purchases.
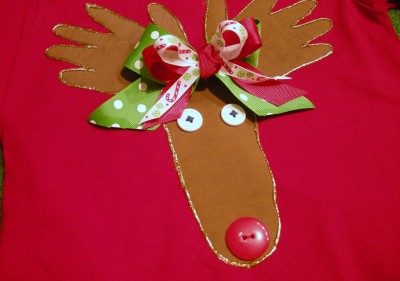
“Mama, I can’t find my Christmas shirt”.
Well, there was a good reason for that, Katy didn’t have a Christmas shirt. Apparently, I missed the memo on that being a requirement this year. I did take her to look for a Christmas dress about a month and a half ago but my ideal of gingerbread appliqued corduroy jumpers (by the way, corduroy is harder to spell than you’d think) were shunned as Miss Katy Rose chose her sparkly, flowy purple number. I guess she had a change of heart this past weekend at our cupcake decorating party where all of the other little girls showed up sporting…you guessed it: Christmas shirts
So as soon as the boys were off to the scouts meeting, Katy and I headed to that shopping mecca that is Wal Mart, to look for her a shirt. They usually have tons of them this time of year but to my surprise, not a single one was to be found. I asked a few associates and kept getting sent back to look at the areas I’d already canvassed. At last, we accepted our fate. Rather than buy a shirt pre-made, we were gonna get to have some fun with it!
~GRINS~ Now, I was getting excited.
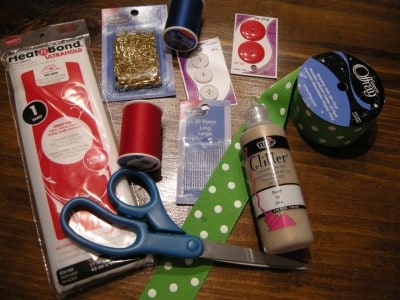
You’ll need: Heat N Bond iron on adhesive, safety pins (If you want to put a bow on it, leave these out if you’re making this for a boy), buttons for eyes, button for nose, thread to sew buttons on with, hand sewing needles, scissors, fabric paint, and ribbon for a bow if this is for a girl.
Of course, you’re also gonna need a shirt and some brown fabric for the reindeer. I buy the cheap, cheap brown fabric from the craft department that is kind of thin and cost about two dollars a yard. One yard will make you a whole herd of reindeer!
**Wash and dry your fabric and shirt before beginning. Don’t use fabric softener when you wash them as that will interfere with the bonding.
All of these supplies can be found in the Wal Mart craft department or at Hobby Lobby. I LOVE Hobby Lobby.
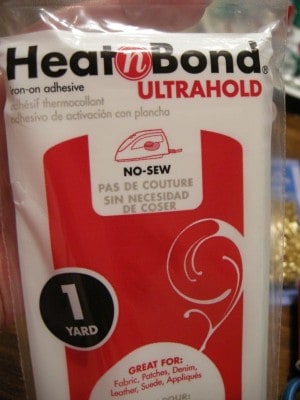
This is the most important part. Heat N Bond has come a long way lately and if you get this type, your shirt will be completely machine washable with a bond you won’t ever have to worry about. Look for “No Sew” and “Washable”, or just look for this exact package and don’t worry about the rest.
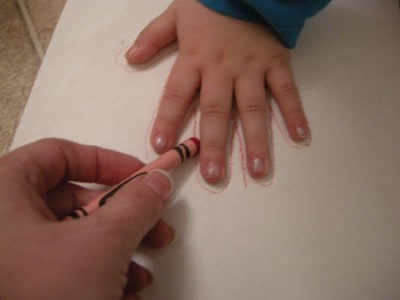
Trace your wee one’s hand.
In my house, I can find a dozen crayons at any given time but LAWD help us if I should need to find a pen…
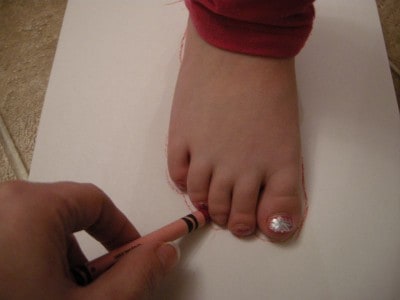
Trace their foot, too.
Katy has fun with her nail polish. ~squints her eyes~ I think that is supposed to be a flower on her big toe…
I’m all for self expression as long as it doesn’t involve permanent tattoos or unusual body piercings.
She has to wait til she’s thirty for all of that. Umm…maybe forty.
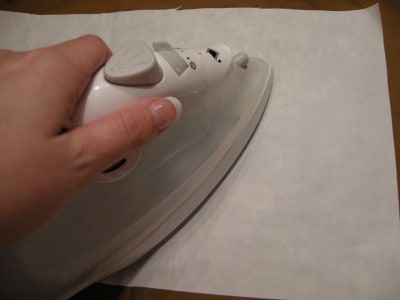
Place your heat bond sticky side down onto your fabric.
I am using fabric that doesn’t have a front or back side but if yours does, you want to iron this to the back side of it.
Your iron should be on medium setting with no steam. Just press each section for about two seconds.
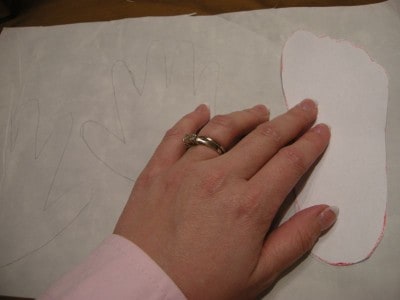
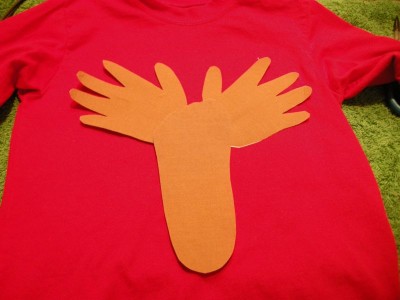
Cut out foot and hand pieces and trace them onto the paper that is now bonded to your fabric.
When you trace the hand the first time, flip it so that the thumbs face each other and this will make your final antlers look more realistic.
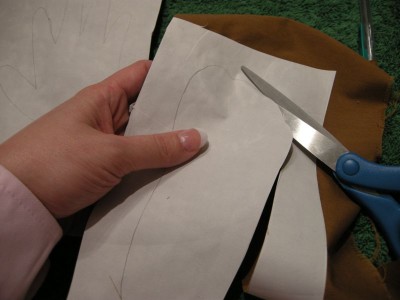
Cut out pieces.
Peel off paper backing. The side will now be shiny.
Place this shiny side down on your shirt and arrange it like you want.
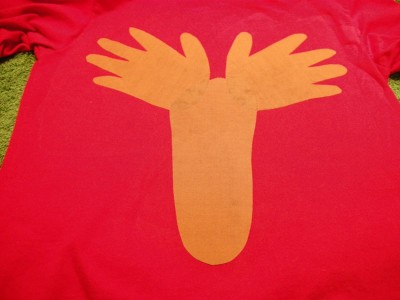
Iron each piece until it is fully bonded.
You need to spend about eight seconds on each part but be careful to do a little at a time so as not to scorch the shirt.
Just remember, you can always go back and iron it again, so go lighter the first round or two. It will all be bonded in the end.
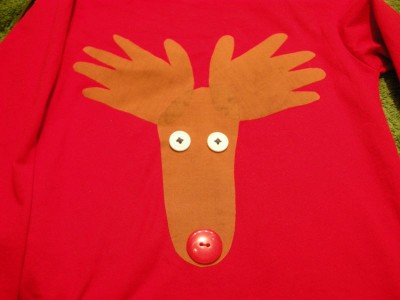
Sew eyes and nose on by hand. I used blue thread to sew the eyes on so the reindeer ends up with blue irises, and red thread for the nose.
Back when I made Brady’s, I found buttons that were wiggly eye buttons and those were really precious on this.
I didn’t see those last night, though, so we made do.
I am a firm believer that “making do” is the best way. It causes you to be more creative!
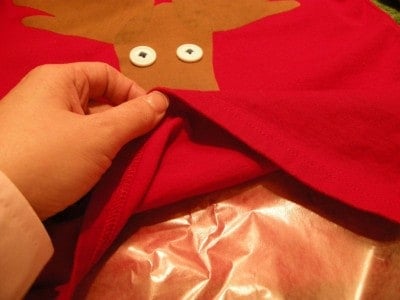
Place some waxed paper inside your shirt so our paint in the next step won’t bleed through.
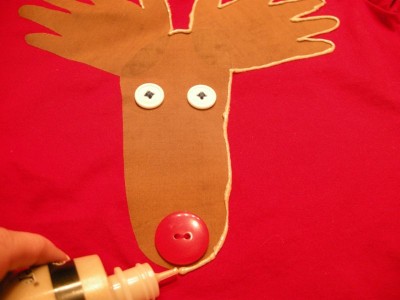
Go around the edges with machine washable fabric paint. I am using gold glitter paint but you might want to use green, red, or even brown.
Whether or not it is glittery is up to your and your little “deer”.
Okay…now that was cute. Get it? You’re little “deer”? You see we’re making a deer and your child is dear to you and…
~sighs~ Okay, I’ll get back to the shirt.
This has to dry for about four hours.
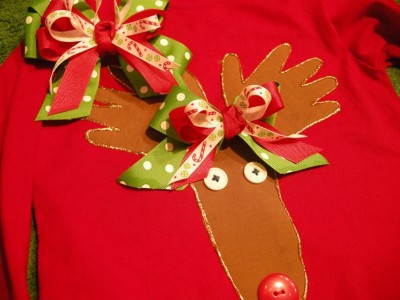
I then made a matching hairbow for Katy Rose and her Reindeer and I put this on the shirt with a safety pin so I can take it off to wash the shirt.
Of course, Rudolph technically wouldn’t have worn a hairbow but we don’t get hung up on technicalities here.
My hairbow tutorial can be found here.
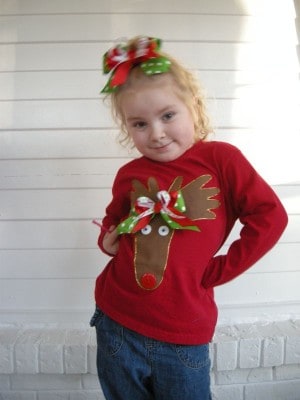
Katy Rose posing all sassy with her Reindeer shirt.
There are TONS of uses for this deer pattern! Here are some other things I’ve done with it:
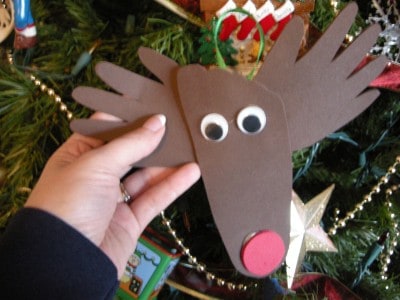
This is a reindeer ornament which I make using craft foam, googly eyes, and a hot glue gun.
Super easy and makes a great keepsake, especially when you do one each year and see how much bigger they get!
If you have a baby or small children, these are VERY well received as gifts for Grandparents!
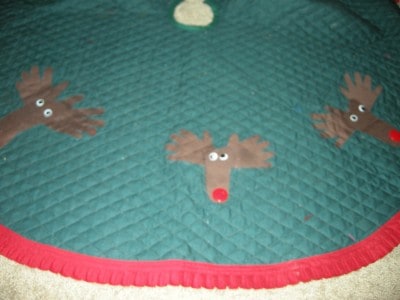
This is a tree skirt I made.
You can buy a store bought tree skirt and put the reindeer on it exactly like you do the shirt.
The reindeer pictured here are from Brady’s first, second, and third Christmas.
Wishing you a merry Christmas to you and your Dears!
“Christmas gift suggestions:
To your enemy, forgiveness.
To an opponent, tolerance.
To a friend, your heart.
To a customer, service.
To all, charity.
To every child, a good example.
To yourself, respect.”
~ Oren Arnold
Submitted by Melissa Hand on our Facebook Family Page. To submit your quote, click here.




When I first saw the shirt I thought, how am I going to trace that pattern. I would never have thought of using the little ones hands and feet. That is the most wonderful thing, thank you for your great ideas. Your website has made the holidays come alive for me once again. Thank you and HAPPY HOLIDAYS!!! I understand that capital letters mean you are shouting and it is right I AM SHOUTING WITH HAPPINESS THIS HOLIDAY SEASON.
My daughters preschool did these shirts when she was 3. I couldn’t bear to get rid of it, so I stuffed, sewed up the arms, neck and bottom holes and now it is my favorite Christmas pillow. She is thirteen this year and thinks it is crazy that I have hung on to it all theses years, but I still LOVE it!!!!
Thank you for sharing……You are so crafty
Merry christmas
Jean
My son’s preschool class made these last year, but they used fabric paint and just put the kids’ hands right onto a white shirt. They turned out adorable. They also glued on googlie eyes and a pompom nose. Around the neck they did a large X design and put green dots between each open space and then painted the shirt in a gold glitter. Been through several washings and is still holding strong. Very creative ideas.
LOVE this idea.
Am thinking of making this for next years santa pix-talk about a memory!
Picture 32 first graders on stage to sing carols – all with their reindeer shirts aglow. And the teacher had one on too, but she obviously had used her husbands appendages for the tracing. It was so cute. Kinda had a stampede when it was over.
I LOVE YOU!!! Okay technically I don’t know you but I have to admit I am addicted to your site!! I am so excited to see the bow tutorial. I have admired your daughter’s bows for weeks now. We have become “financially challenged” around our home this year and with 3 kids under 6 it’s been really tough. Thank you for sharing all of these inexpensive fun ideas. I’m so excited to be able to share them with my children. Thank you so much!!!