Corn Relish
As an Amazon Associate I earn from qualifying purchases.
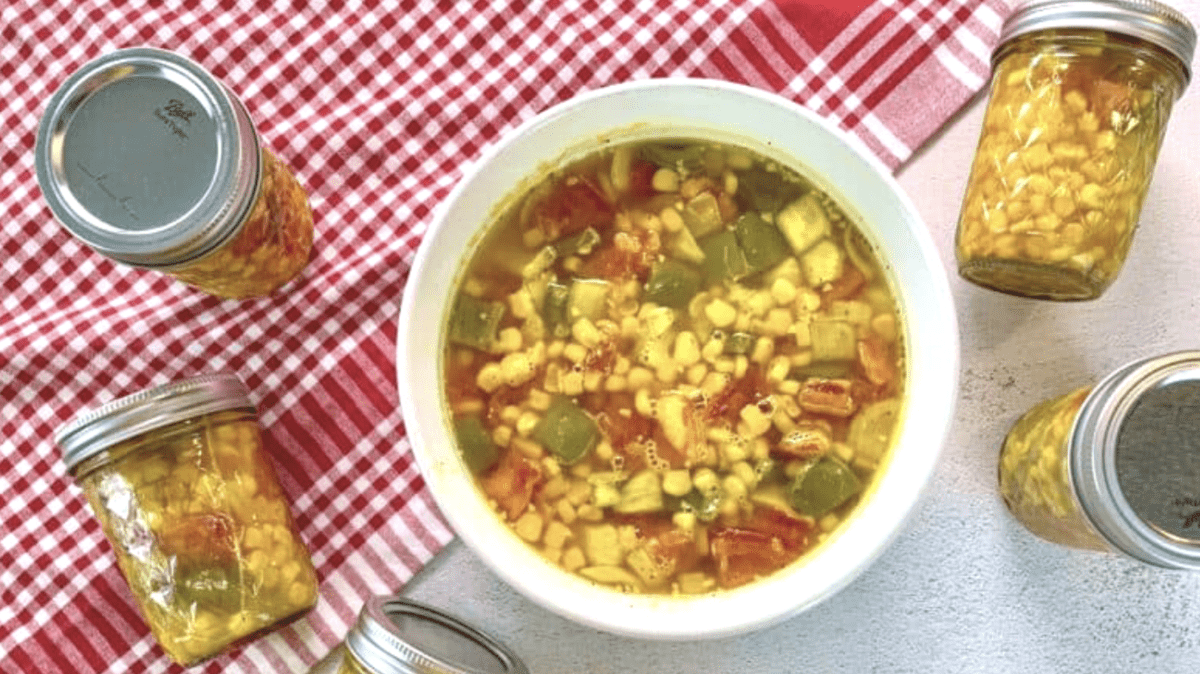
Similar to Southern chow chow relish, my easy corn relish recipe is bursting with flavor and vegetables, like bell peppers, onion, tomatoes, and corn (of course). It’s tart, sweet, and oh so delicious.
Although it may be considered antiquated and unnecessary by some, I personally love to can things! I can’t help but think about the old days, how efficient houses ran back then, out of necessity. Women would tend to their gardens all summer long not as a hobby but knowing that how that garden fared would determine how their family fared over the winter months. Eating fresh vegetables during the summer with a constant eye on canning, dehydrating, and various other methods of “putting up” food for the winter. How much a woman canned really made all the difference in whether or not her family went hungry. With that in mind, it’s hard not to have a reverence and appreciation for canning today.
Why Make Relish?
Relish was an easy way to save vegetables and the combinations were limitless. This corn relish recipe is a little similar to a relish called “End Of The Garden Relish” or chow chow, where you pretty much took everything that was left in the garden and combined it together. However, chow chow’s main vegetable is cabbage, while this time we’re focusing on corn. I customized this recipe for my own tastes and you can do that, too. Just know that as you add or take away you will end up with more or less in terms of quantity to can.
This time around, I’m pickling corn, bell pepper, tomatoes, and onion in a pickling liquid that’s bursting with flavor. It includes vinegar, turmeric, ground mustard, celery seed, sugar, and salt. This is a really easy relish recipe to make, I promise. And the reward is multiple jars of corn relish to keep you and your family happy for a long time.
You Absolutely Can Can!
Now for those of you who say “I wish I could can” I want you to know that you ABSOLUTELY can! Canning is simple as can be, so don’t be intimidated by it. Folks have been doing it for countless generations and there is absolutely no reason why you can’t, too. You don’t even need any special equipment, other than the jars and lids. I don’t even own a canner, I just use a big old pot lined with a dish towel to keep my jars from clinking together while they are boiling. I did a full tutorial on this a year or so ago with step-by-step photos and even a little video to start it out so click here to go visit that and can away!
Recipe Ingredients
- Bell peppers
- Tomatoes
- Vidalia onions
- Vinegar
- Frozen corn
- Spices: ground turmeric, ground mustard, and celery seed.
- Salt
- Sugar
How to Make Corn Relish
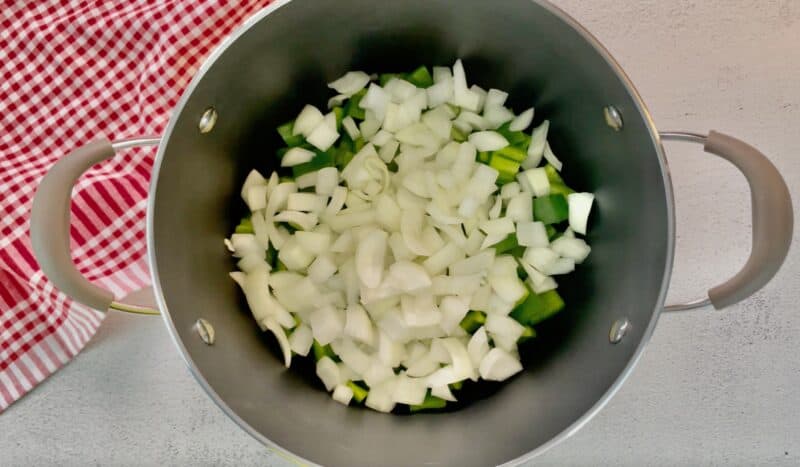
Chop up your onion and bell peppers.
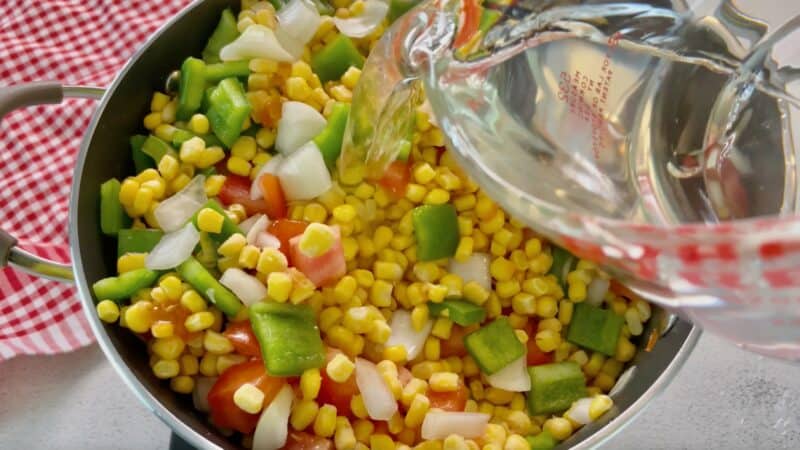
Add your tomatoes.
Add in your corn and water.
Now you’re gonna need a R-E-A-L-L-Y big pot!
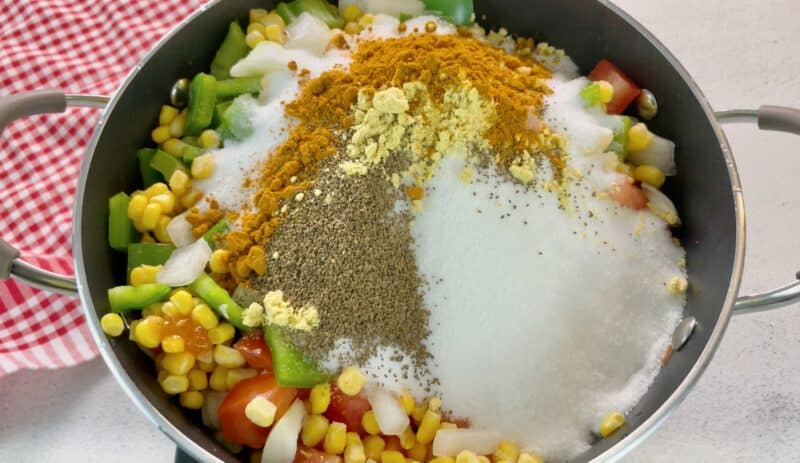
And your sugar, salt, and vinegar.
I know you are thinking this is a lot of salt but keep the number of vegetables in perspective and it really isn’t. You do need the salt, honest. It won’t taste salty when you are done.
Add your spices.
Stir that up as best you can.
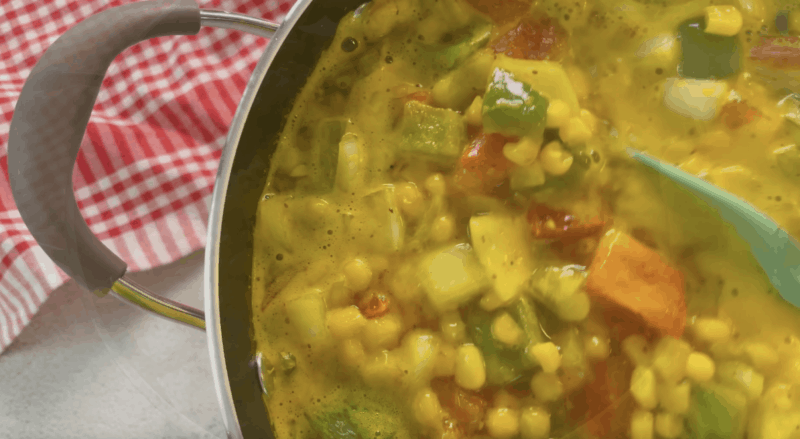
First, you’re going to bring it to a boil over medium-high heat, stirring often. Then reduce the heat to medium and keep stirring every now and then, for about 30 minutes, or until the vegetables are tender.
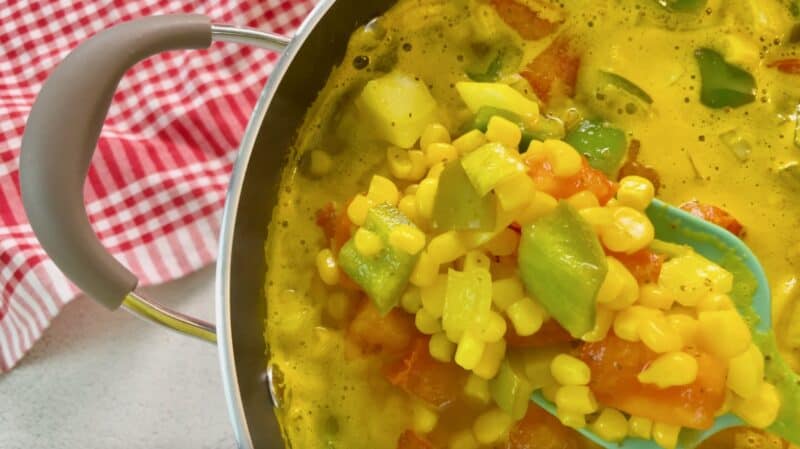
You are going to think “wow, this is not nearly enough liquid” but as your vegetables start cooking up it will generate a whole lot more.
Here it is stirred up after it has cooked for a little bit.
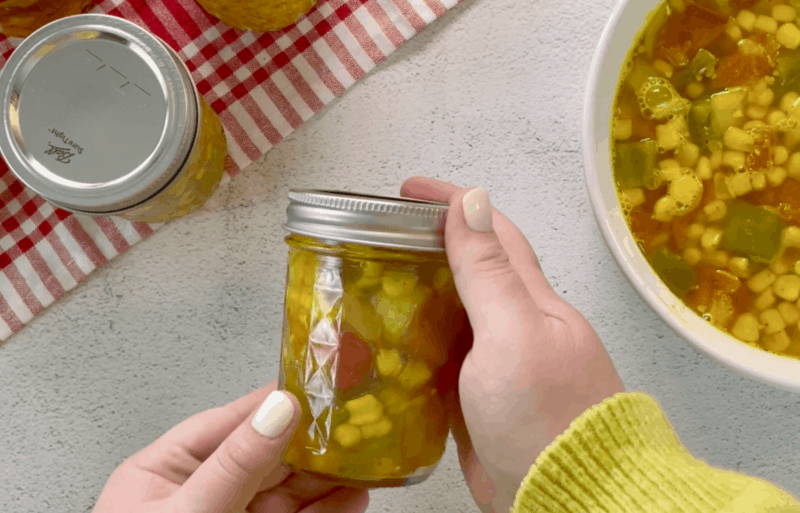
Can according to directions found here.
Enjoy your garden all year long with this yummy sweet corn relish.
Storage
When canned and stored in a cool, dry place, your corn relish will last for up to one year. Once opened, the relish will last in the fridge for up to 2 months.
Recipe Notes
- Here are some variations to make this corn relish recipe work for you:
- Use white vinegar, white wine vinegar, or apple cider vinegar.
- Add red bell peppers or green bell peppers, and yellow onion or sweet onion.
- Add other vegetables you might have on hand, like celery or cucumber.
- Use different spices, like ground allspice, mustard seeds, crushed red pepper flakes, coriander seeds, or ground cumin.
- Add 1 minced jalapeno pepper or serrano pepper for some spice!
- You want to use coarse salt like pickle salt or kosher salt, not iodized table salt.
Recipe FAQs
Should I use fresh or frozen corn?
Of course, you can use fresh corn kernels but I gotta tell ya, if I’m going to go to the trouble of shucking and preparing fresh corn, I’m gonna eat every last bite of it fried. I recently put up 80 ears of corn and ended up with enough for about 5 meals. That’s a lot of work for just a few meals! Fresh corn is a precious thing and since we’re canning this you won’t be able to tell much difference so let’s keep it easy, alrighty?
Do the tomatoes need to be ripe?
They don’t have to be ripe, but if they are that is alright. You can even use green tomatoes if you like.
Where did corn relish originate?
It’s believed that traditional corn relish originated in the South and in particular in Louisiana.
How do you serve corn relish?
When it comes to ways to serve corn relish, the options are basically endless:
- Add it as a topping to burgers, hot dogs, or sandwiches like a pulled pork or grilled cheese sandwich.
- Mix it with black beans and cilantro to make something reminiscent of summer corn salad, then add it as a topping to tacos or burritos.
- Serve it on a cheese board or an appetizer with corn chips for scooping.
- Serve it as a side dish with a main dish like Southern fried chicken, Southern fried catfish, pork chops, or roasted chicken.
- Enjoy it for breakfast with an omelet or eggs and bacon.
- Add it to your next pasta salad or tuna salad.
Check out these other relish recipes:
Ingredients
- 3 32-ounce packages frozen whole kernel corn
- 4 cups chopped bell peppers
- 2 cups chopped Vidalia onions
- 4 cups chopped red tomatoes
- 5 cups vinegar
- 2 cups sugar
- 1/4 cup kosher salt
- 1 tablespoon turmeric
- 1 tablespoon celery seed
- 1/2 tablespoon ground mustard or dry mustard powder
Instructions
- Combine all vegetables in a large pot. Add vinegar, sugar, salt, turmeric, celery seed, and mustard. Heat to a boil, stirring often. Reduce heat and simmer for 30 minutes or until vegetables are tender, stirring every now and then to ensure even cooking.3 32-ounce packages frozen whole kernel corn, 4 cups chopped bell peppers, 2 cups chopped Vidalia onions, 4 cups chopped red tomatoes, 5 cups vinegar, 2 cups sugar, 1/4 cup kosher salt, 1 tablespoon turmeric, 1 tablespoon celery seed, 1/2 tablespoon ground mustard or dry mustard powder
- Seal in hot, sterilized canning jars according to directions that can be found in my canning tutorial. Try to get an equal amount of liquid in each jar. You need a good bit of liquid to cover the vegetables but you strain that out when you serve them. Process for 10 minutes in boiling water for pint size, and 5 for half pints.
Kolene submitted this to the quote page yesterday and I just loved it. Be sure to send it to someone you care about today, I bet they could use a hug in their email!
Quick!
Put your left hand over your right shoulder and
your right hand over your left shoulder!
That was a quick hug from me!
Submit your quote by clicking here.







Whatever happened to putting up jams and jellies and using wax to seal them instead of canning? My grandmother always canned the veggies and made jams and jellies (with wax seals) out of her fruit. My grandfather who was a carpenter made shelves out in the garage for all the stuff she put up. One winter the garage caught fire and we all had to stand there listening to all the jars pop open. My grandma cried and cried at that, but next spring the garden was twice as big to make up for it. they lived un the burbs but had a double house lot and while we all used to play there it became a big, big garden. The double lot was fenced and my grandma planted a different rose bush every time a new grandchild was born. She had 15 rose bushes by the time she passed on. Plus she had a front porch that the covered in climbing roses and lots of other flower around the yard. She grew up in West Virginia and felt we city kids needed to know what it was like when she was growing up. We all worked in the yard and she taught us all to can what was grown. The boys, well I can remenber grandpop putting bowls on their heads to give them haircuts. Sorry for wandering. Can anyone answer me about the wax seals? I surely would appreciate it.
Kathie-you can still seal jams and jellies with that method. You just purchase bars of paraffin and carefully melt it. I usually use an old coffee can or something I can toss away rather than a good pan. It is flammable though so be very careful handling it around an open flame. Pour it on the jelly jars that you have filled and let harden. Takes less than a half inch of covering to seal. my frugal mom even washed the paraffin off as she opened the jelly to save for remelting the next season.
That is actually the way I was taught to can as well, by my own grandmother, and a lot of people still use this method of either packing the jars with hot liquid and allowing them to seal with the metal lids or sealing them with paraffin – but not processing them in boiling water either way.
While I was working on my Home Economics degree though, I learned that food scientists and the USDA have tested foods that were canned this way and warned that this method of canning presents ideal breeding grounds for botulism, which is an often fatal form of food poisoning.
What do you do differently to make it safe? That’s the simple part! Just “process” your filled jars by placing them in boiling water for however many minutes the recipe indicates. Just five minutes of being in boiling water for a half pint jar can make all the difference in the world. (more detailed instructions are in my canning tutorial https://www.southernplate.com/2008/09/yes-you-can-can-canning-tutorial-with.html)
Of course, folks are still using this method and I’ve even seen people teach canning without processing on food blogs and other places around the web. The thing is, with not that many people canning like they used to, there really isn’t any good way to get the new information out to folks unless they take a class at the extension service or read one of the latest USDA recommended manuals. I know people who still can this way but I always process my jars nowadays and find that it is very little trouble for peace of mind.
Here are a few links you can read over for more information if you like.
http://www.associatedcontent.com/article/525433/why_open_kettle_canning_is_a_really.html?cat=5
http://dbs.extension.iastate.edu/answers/projects/answerline/questions/answer248.html
I hope this helps!
Gratefully,
Christy 🙂
Happy Birthday! Janice
Good choice for the corn relish, Mama know’s best! ; )
Have a wonderful birthday and I wish you many many more.
Thanks Christy!
Be sure and give your Mama a great big hug.
blessings to you,
Sheila
What would you suggest in place of the celery seed? That’s a real deal breaker for me. But the corn relish looks so yummy, I’d really like to try it. I’m just breaking in my kitchen apron and need all the help I can get!! 😉
Hey! Don’t you worry one bit, you can just leave it out entirely and don’t need to add anything in it’s place. It’ll still be great!
Happy Birthday to your Mama! Today is my Daddy’s 69th birthday!
I’m going to can before summer is over. My Daddy just canned a bushel of green beans – yum! Thanks for the tips and recipe!
Happy Birthday to Mama!!! I love corn relish and will have to try my hand at canning. Never tried canning ~hangs head in shame~ but have done many freezer jams!!
Bountiful Blessings and a big hug!
So far I’ve made 2 batches of salsa, dill pickles and some pickled cherry tomatoes. This corn relish sounds wonderful!! I”ve found a lot of “younger” people are canning, they are trying to be as frugal as possible and take good care of their families.
I have never canned anything in my life. My sister used to make jellies. I want to try this someday, looks really good. thanks again for yet another great post.
xoxox