Christmas Tie Dyed Cheesecake Brownies
As an Amazon Associate I earn from qualifying purchases.
If you’re on Pinterest or Facebook, I’d love it if you could use one of the buttons above! Thank you, now let’s make some Christmas Tie Dyed Cheesecake Brownies 🙂
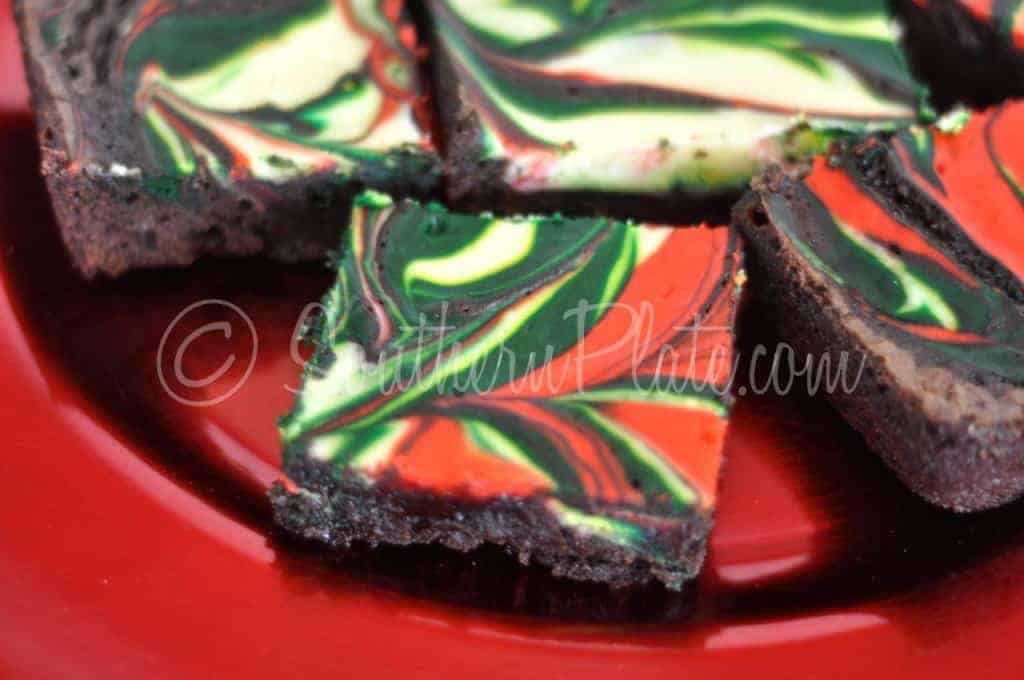
Aren’t these Christmas Tie Dyed Cheesecake Brownies gorgeous? They taste even better! The best thing about these little beauties though, is how easy they are to whip up. You can start with homemade brownie batter but I just use a boxed mix, then mix up the cream cheese batter and you’re good to go! These add a fun touch to a school party, office get together, or a great hostess gift during the holidays. They’re just so stinking pretty that you gotta love ’em!
To make these Christmas Tie Dyed Cheesecake Brownies you’ll need: A box of brownie mix (and the ingredients called for on the box to make them), one egg, a little sugar, some clear vanilla*, and a brick of cream cheese that has been softened at room temp (here’s how to easily make homemade cream cheese).
You’re also going to need some gel food coloring* to give the brownies their festive red and green swirls.
*Clear vanilla can be found at the grocery store, just hunt through the flavorings section. It can also be found in the cake decorating section at Wal Mart, Hobby Lobby, and Michaels *Gel food colorings are a must to have the vibrant colors pictured here. I get mine at Michael’s or Hobby Lobby, also in the cake decorating section. They are a little over $1 each.
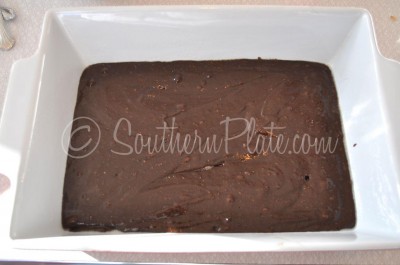
Mix up your brownie batter according to package directions and spread into a greased 9×13 pan.
Set aside while you make the cream cheese mixture.
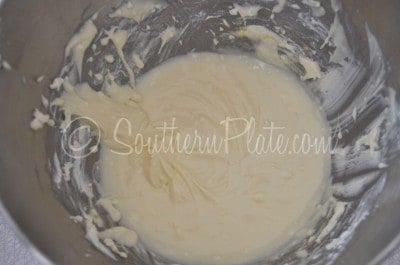
In a mixing bowl, place your egg, cream cheese, sugar, and vanilla.
Note: You can substitute Splenda for the sugar here if you want. Some would argue that there is still sugar in the brownie batter which is, of course true, but just because you can’t bail out the whole boat doesn’t mean there isn’t some good in using your bucket to get what you can.
Beat the living mess out of it until it is smooth and creamy.
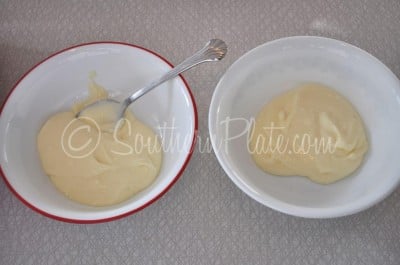
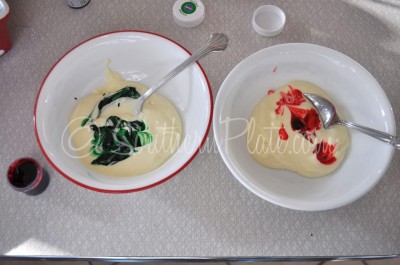
Take 2/3 of the cheesecake mixture and divide it into two bowls, leaving the rest in the mixing bowl until you need it.
Y’all just eyeball this because it’s not like a life is hanging in the balance if we don’t get exactly 1/3 of the batter in each bowl.
This is cooking, not rocket science – and believe me, having been born and raised in Huntsville, Alabama, I know rocket science when I see it.
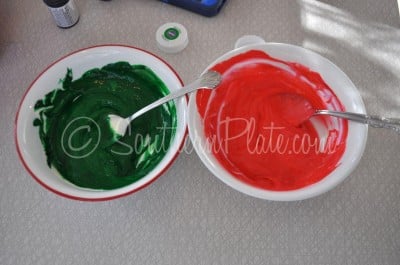
Using your gel colors (because those give us the vibrant colors we want), tint one bowl of cheesecake mixture green and the other red.
Like this 🙂
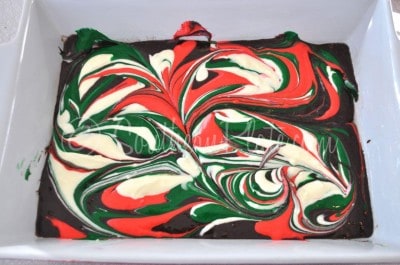
Now drop spoonful dollops of this all over your batter.
And swirl it with a butter knife. I just kind of start drawing “S”‘s into the batter until I like how it looks.
Bake this at 350 for about 30 minutes, or until set in the center.
Allow to cool completely and then cut your Christmas Tie Dyed Cheesecake Brownies into bars.
If you’d like to make individual brownies in muffin papers, here is how you do that…
Divide your batter evenly into a muffin tin lined with papers. Dollop a small spoon of each color on top of the batter.
Swirl that with a knife until you like how it looks.
Bake at 350 for about 25 minutes, or until set in the center.
UPDATE: I’ve had a lot of interest and questions about the square muffin tin pictured here. I got this at WalMart for around $10.00 and I like it so much that I now have two of them. For the cupcake liners, I just use regular round ones. Once you put your batter in them they perfectly conform to the shape of the tin and become little squares 🙂
Look how pretty these Christmas Tie Dyed Cheesecake Brownies are!
I’m heading to catch the first of three flights which will eventually land me in the Dominican Republic where I’ll be taking part in handing out the 100 Millionth Shoebox with Operation Christmas Child! I’ll be sharing details from my trip with you this week on a special post that I hope to update at the end of each day. Click here to visit that post and be sure you check in each morning to keep up with my updates!

Ingredients
- One box Brownie mix and ingredients required on package
- 8 ounces cream cheese well softened and at room temp
- 1 egg
- 1/4 cup sugar
- 1/2 teaspoon clear vanilla*
- red and green gel food coloring*
Instructions
- Prepare brownie mix according to package directions. Spread batter into greased 9x13 pan.
- In large bowl, combine softened cream cheese, egg, vanilla, and sugar. Mix until smooth and creamy with electric mixer.
- Divide cream cheese mixture into three bowls. Tint one bowl red, one green, and leave one white.
- Using a spoon, put dollops of each color all over top of brownies (see post for photos). Take a butter knife and gently swirl icing until blended and looking like tie dye.
- Bake at 350 for 30 minutes, or until set in the center. Allow to cool completely before cutting into bars.
Can also do this in muffin papers to make individual brownies. Just put a dollop of each color cheese cake mixture on top of brownie batter in each muffin cup. Bake approximately 20- 25 minutes, or until set in center.
*See post for notes on where to find these ingredients
Nutrition
Butterflies don’t know the color of their own wings,
but human eyes can see how beautiful they are.
Likewise, you don’t know how special you are, but others can see the good in you.
~Anon. Submitted by Jackie. Add your inspirational or motivational quote to our collection by clicking here.
; ;







These are simply pretty. I am going to make these this Christmas!! We always have birthday party for Jesus on Christmas Eve ! So my little ones, husband and I will have a fun making these!!
What a great idea for the brownies…..especially for Christmas…so colorful….
Will be making these 🙂
Just have a quick question…will you be sending us an email every day so we can enter this contest ? I missed out on the other one, only got to enter once,never was able to find your blog that allowed me to enter !!!!!
ahhh excuse me whats a clear vanilla ladies..thank you
Pretty AND easy. My favorite kind of Christmas treat! Thanks for sharing!
Perfect idea. I have the all the ingredients and it is just what I needed to take to a get together Friday. Thank you!
all I can say is YUMMMMM, kids will love it!!
I love all your descriptions like “beat the living mess out of this”!!! Mine are in the oven for Christmas tomorrow, and so far my only comment is that the gel icing only made my mixtures pink and mint green, so I added a LOT of food coloring…..we’ll see!